Advertiser Disclosure: At Slickdeals, we work hard to find the best deals. Some products in our articles are from partners who may provide us with compensation, but this doesn’t change our opinions. Our editors strive to ensure that the information in this article is accurate as of the date published, but please keep in mind that offers can change. We encourage you to verify all terms and conditions of any product before you apply.
Reading Time: 6 minutesIf your PC has been feeling sluggish lately, chances are that your old hard drive is to blame. The best way to speed up a struggling PC is to replace your old-fashioned hard disk drive with a speedy new solid state drive (SSD). The newest SSDs, commonly referred to as M.2 SSDs, are so fast they’ll allow your PC to boot up in mere seconds. And the the good news is that upgrading to one is both relatively cheap and easy to do.
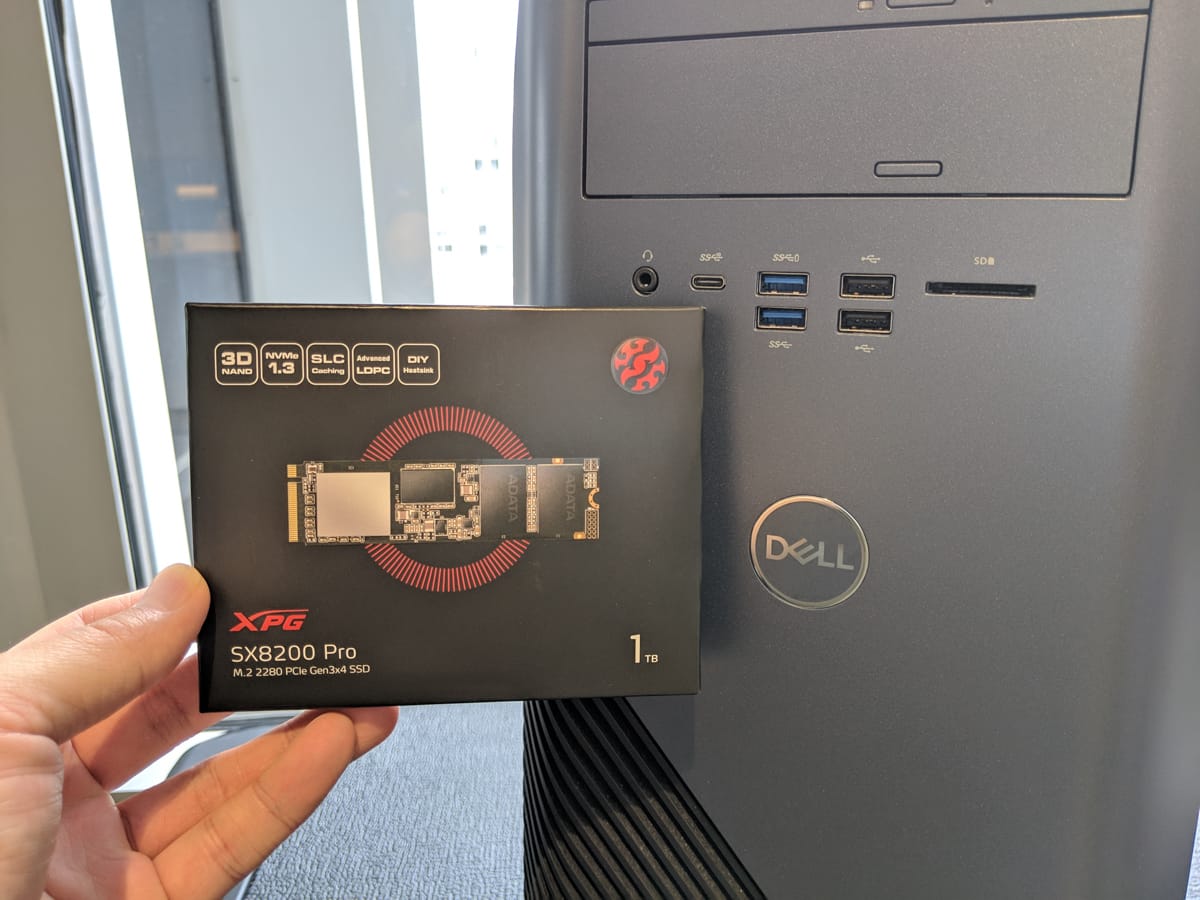
Be sure that before you buy anything, you check that your PC supports M.2 drives. (More on that below.) In this guide, we install an ADATA XPG SX8200 Pro 1TB M.2 SSD into our 2017/18 Dell Inspiron Gaming Desktop PC. Our hardware may differ from yours in design and layout, but most PCs follow the same well-established design queues.
Excellent deals on SSDs feature regularly here on Slickdeals, so getting your hands on one for cheap should be easy. Once your zippy new drive is in hand, follow the simple steps below to get it installed. Soon enough your computer will be up and running faster than when it was brand new.
How to Install an M.2 SSD in a Dell Inspiron Gaming Desktop
1.) Disconnect power and open the PC case
First, make sure your PC has a slot for an M.2 drive. Disconnect your PC from the mains and open up your case. This is usually as simple as removing a couple of screws on the rear and sliding off the side panel. Your PC should look something like this inside. Pardon our dust!
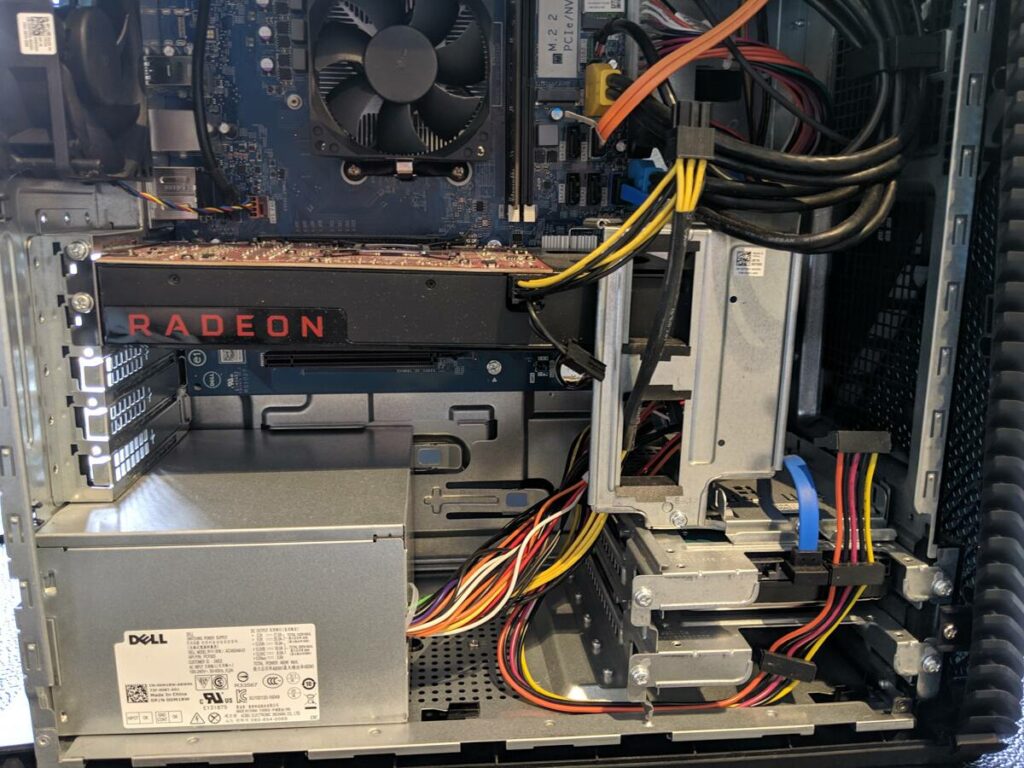
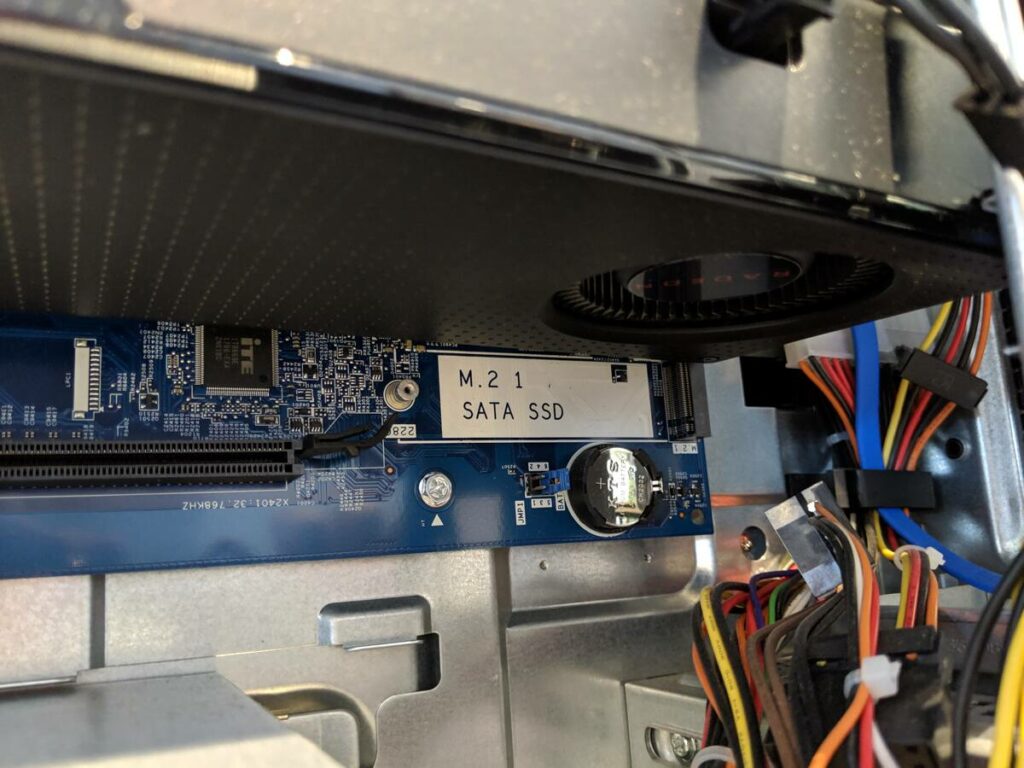
2.) Locate the correct M.2 slot (PCIE/NVME or SATA)
You’re looking for a narrow slot usually marked M.2 SATA or M.2 PCIE/NVME. The key thing to note here is that there are two different kinds of M.2 drives, and you’ll need to buy the correct one. Either PCIE/NVME or SATA will work, but PCIE is the newest and fastest connector, and therefor preferable. Also note the number by the screw mount on the left — “2280” — which denotes the size of the SSD needed. In this case, 22 is width and 80 is length in millimeters (mm). Make sure you get the right size SSD.
3.) Purchase an M.2 SSD that matches the slot type and size for your PC
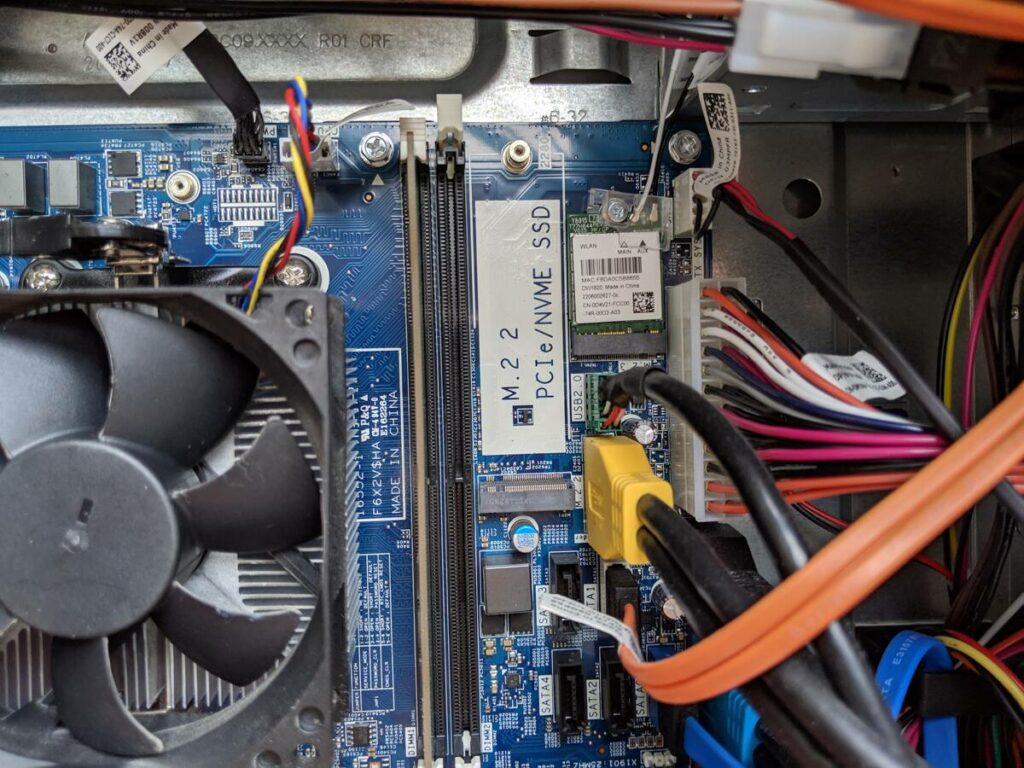
It’s not uncommon for PCs to have more than one M.2 slot. As you can see below, our PC has a second slot for the faster PCIE/NVME standard. These slots are usually clearly labeled, but if you’re having trouble, look at the notches in the connector. Two notches is SATA; one notch is PCIE/NVME.
Note that the slot below is also a 2280 size slot. If in doubt, check your computer manual — most will contain a map of your motherboard. Once you know your slot type and size, you can buy your M.2 SSD.
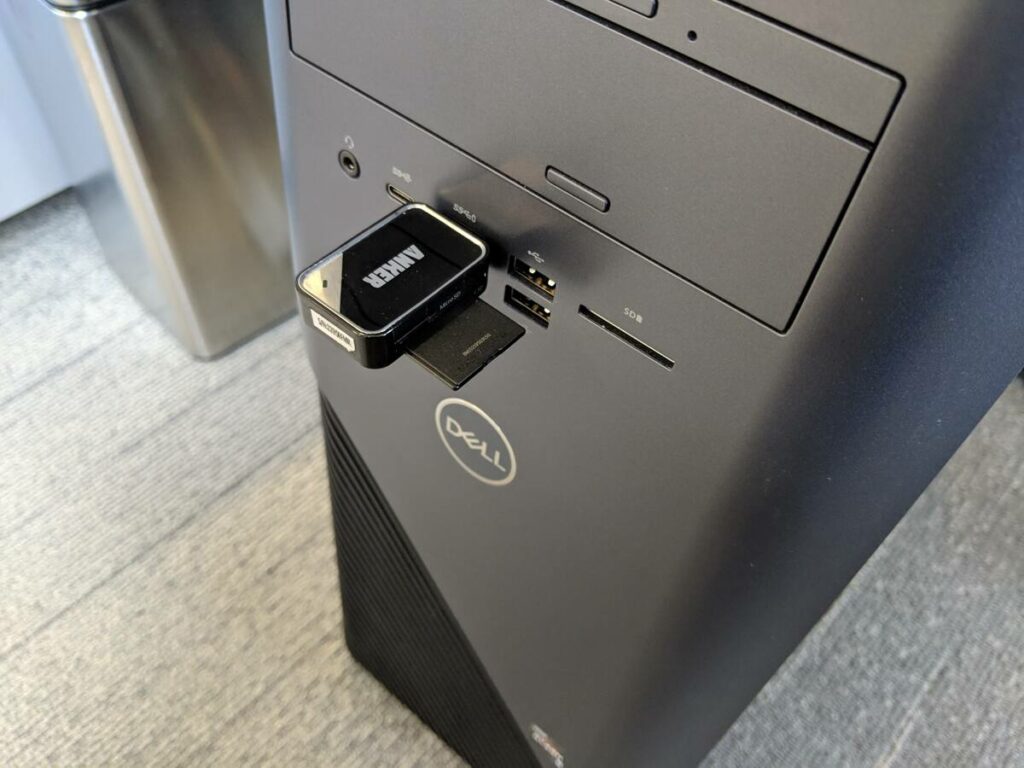
4.) Create a Windows 10 USB boot drive using the Windows media creation tool
Before making any hardware changes, we need to make preparations for installing Windows 10 on your new SSD. Insert a USB memory stick into a USB slot on your PC. Go to Microsoft’s Windows 10 downloads page and download the media creation tool. Run the tool and select the ‘Create installation media’ option. Follow the simple on-screen prompts to create a bootable drive on your USB memory stick.
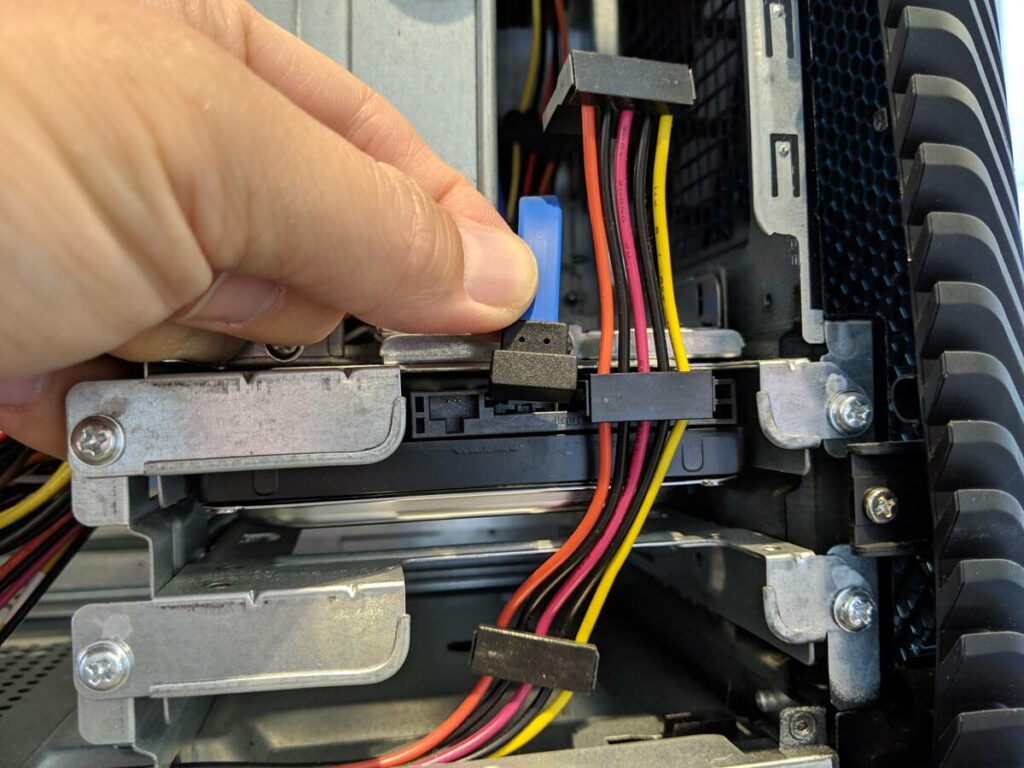
5.) Disconnect your old hard drive
Shut down your PC and make sure the power cable is completely removed. To avoid any confusion later, disconnect your existing HDD by pulling out the smaller SATA cable. This will ensure the PC doesn’t get a signal from the HDD.
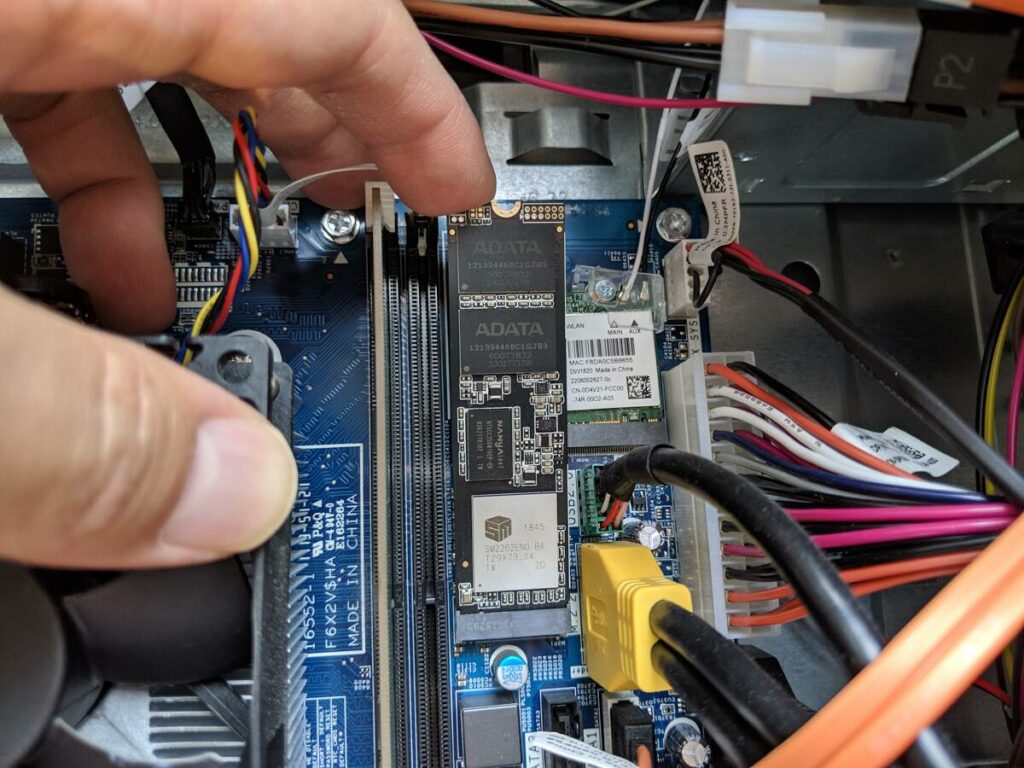
6.) Install your M.2 SSD into the correct M.2 slot
Installing your M.2 SSD is as easy as locating the requisite slot and inserting the drive accordingly. Place the drive in at an angle as shown below, before pushing the drive down flush with your motherboard. Make sure the connectors are inserted all the way.
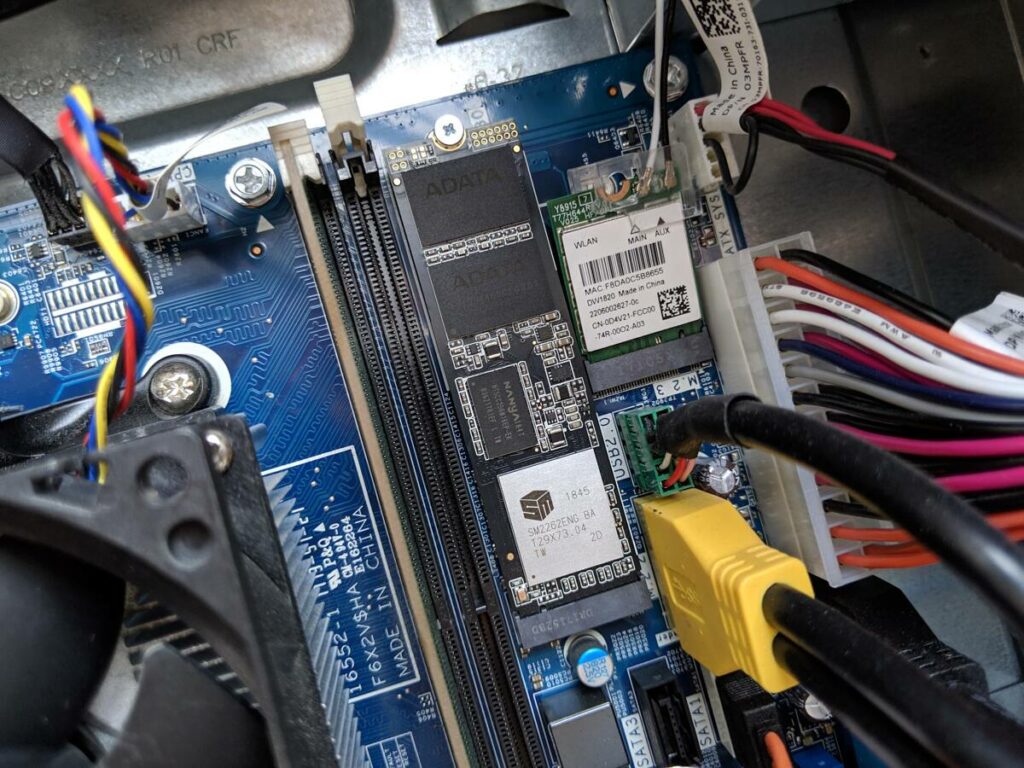
7.) Secure your SSD with the screw and mounting post
If you did it right, one end of the drive will fit nicely into the SATA or PCIE/NVME slot, and the other end will line up nicely with a screw mounting post. Use the screw, which is typically included, to affix the drive firmly in place.
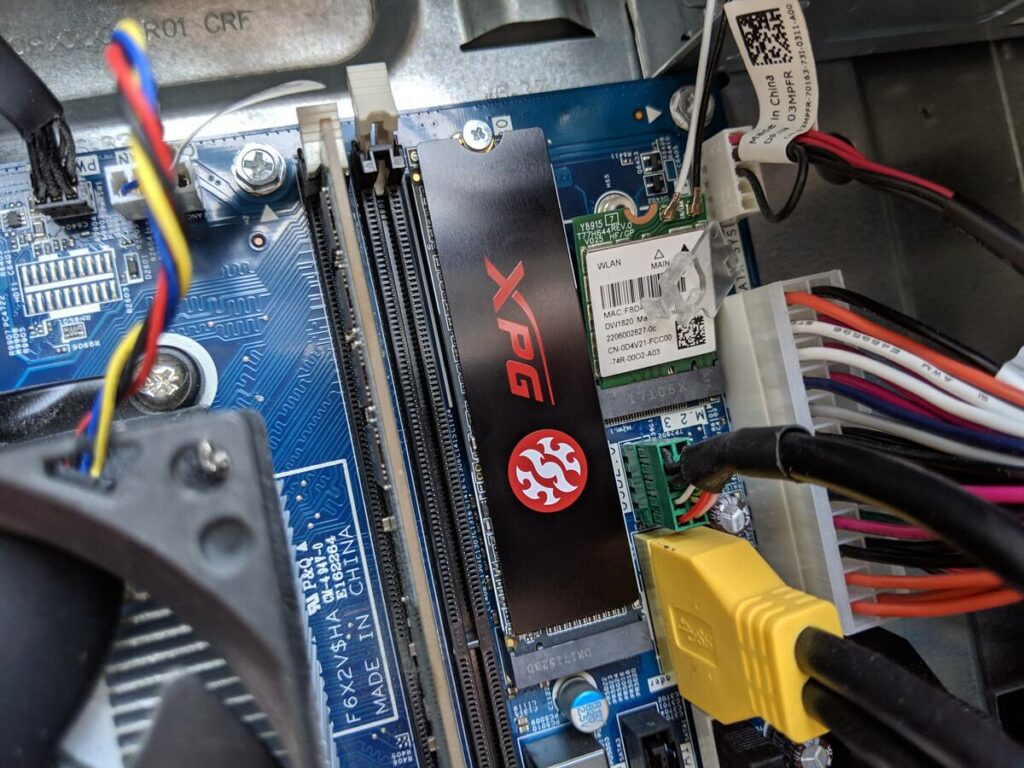
8.) Don’t forget to install your SSD heat plate, if you have one
Some SSDs, including ours, come with fancy external casing. Some are just for show and others serve as heat plates to assist with thermal dissipation. If nothing on your motherboard is in the way, be sure to install your external casing at this point.
9.) Close your PC case, insert your USB boot drive and turn on the PC
With the SSD in place, close up your PC and connect the power. Insert that USB drive we prepared earlier and then turn on the computer. Since we disconnected your old HDD earlier, your PC should automatically search for an alternative boot drive and discover the USB drive.
On the rare occasion that this doesn’t happen automatically, you may need to access your BIOS/UEFI menu (by hitting the Esc/F2/F10/F12 key immediately after turning on the power). From there, you’d need set your PC to boot from USB and then reboot. You can see an example of how to do that here. When the USB is detected, you will be prompted to ‘Press any key to boot from USB.’ If all goes well, you will be greeted with the image below.
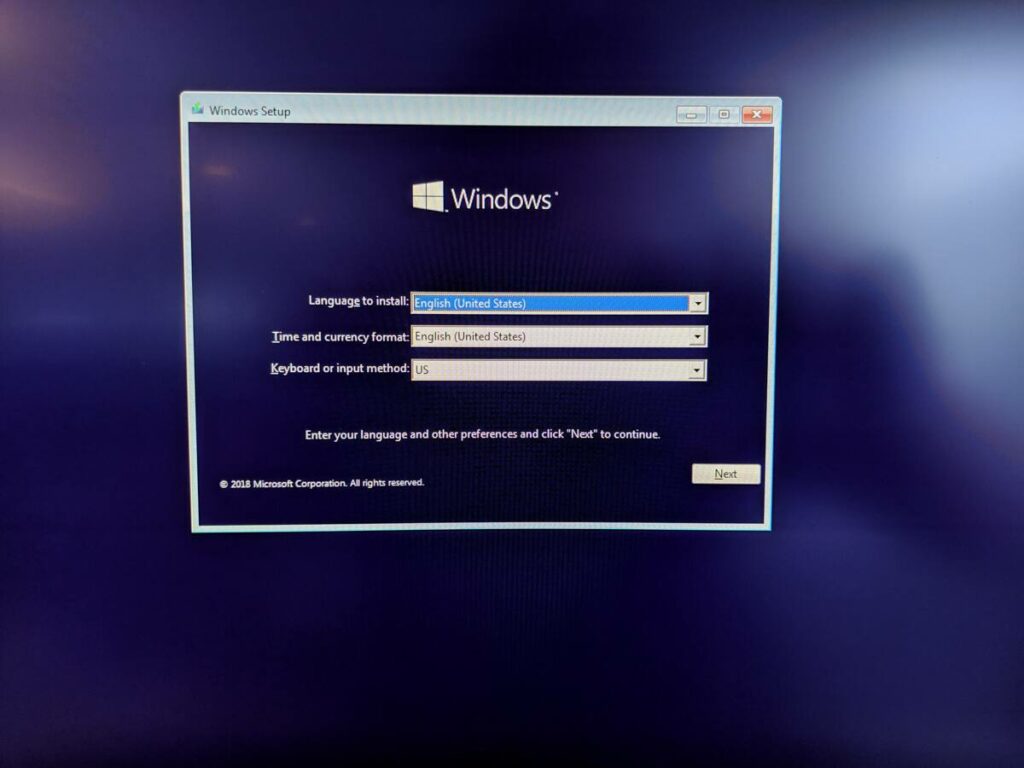
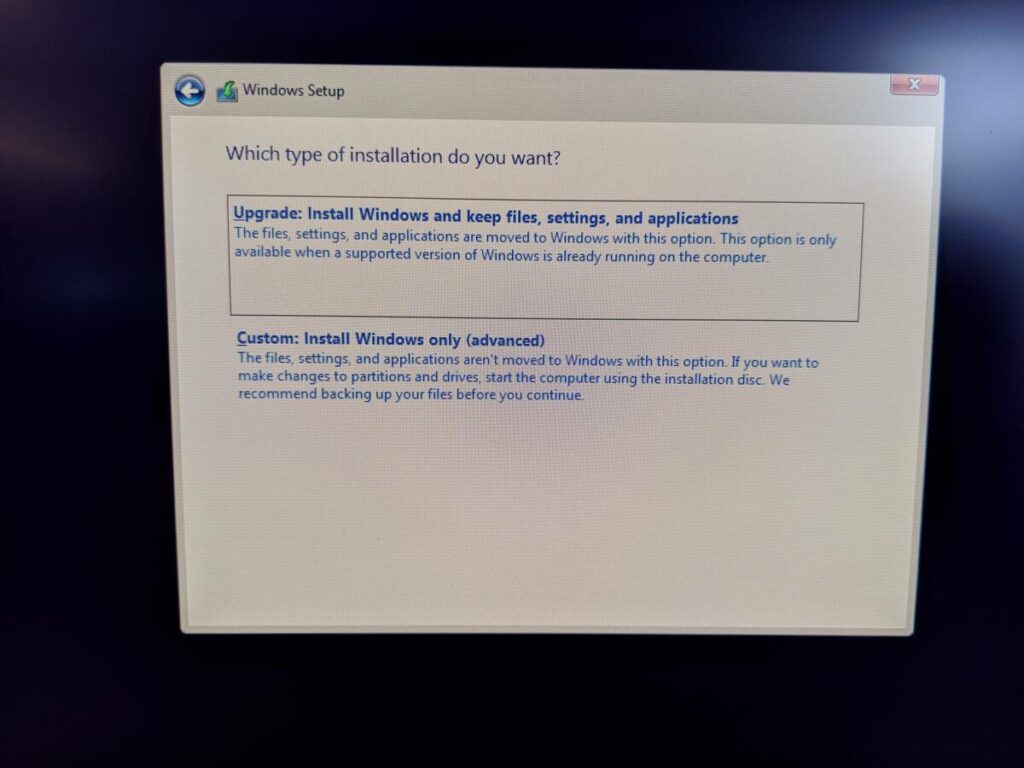
10.) Install Windows 10 using the ‘Custom’ option
Now configure and install Windows 10, which is super intuitive these days. Pick your language and locale. Next up, click ‘Install Now’ and you’ll be prompted to enter your Windows 10 product key. If you have it, enter it here. If not, skip and proceed to the next step (you can enter your product key later). On the screen below, choose the ‘Custom’ option so you can select the correct SSD to install Windows 10.
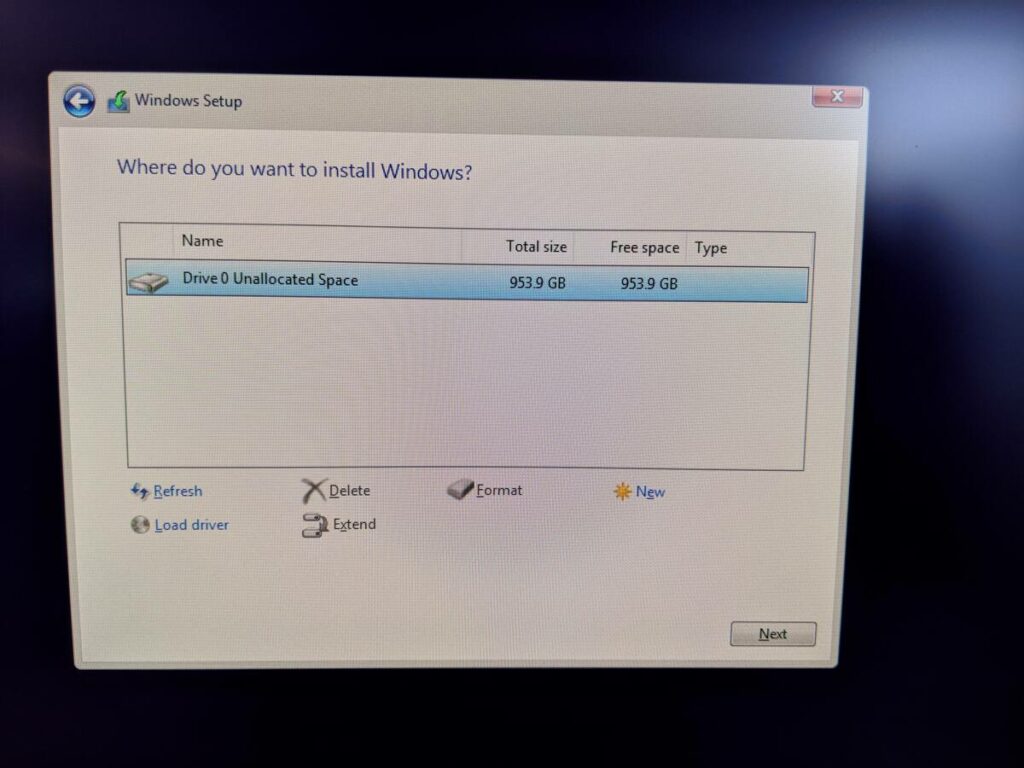
11. Select Drive 0 — or create your partitions — to install Windows
In the list seen below, select the new SSD. If no other drives are connected, it will be Drive 0. You shouldn’t need to manually format it, but if you do, go ahead and do that. In almost all cases, the default settings will be fine, but if you’re more technically proficient, now is a good time to create any hard drive partitions you desire. Click ‘Next’.
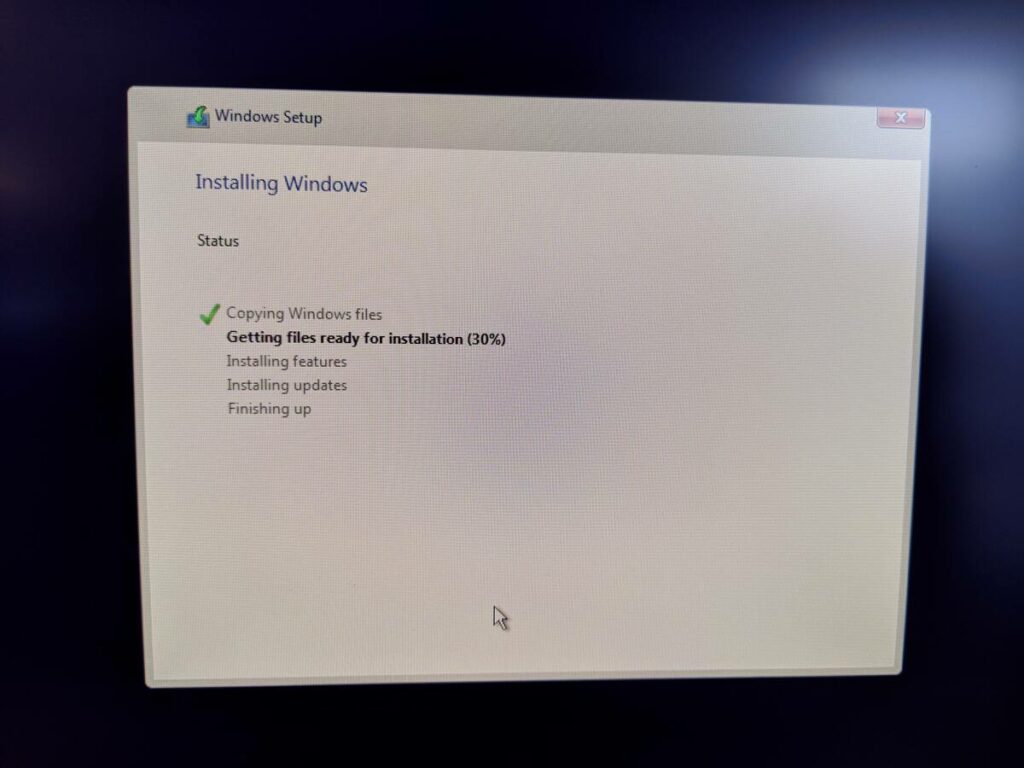
12.) Wait for your new Windows 10 installation to complete
This will initiate the Windows 10 install process, which will take a few minutes to complete. Windows will keep you nicely informed on what it’s doing via the screen below. And before long you will find yourself staring at your new desktop within a freshly installed Windows 10.
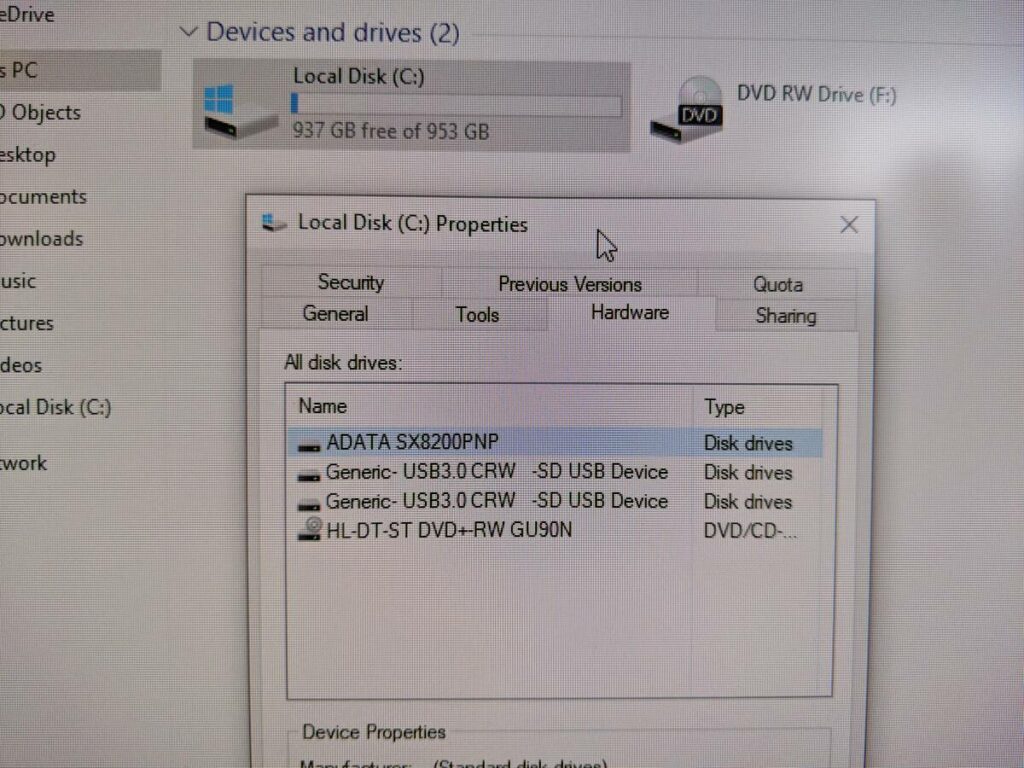
13.) Verify your work and enjoy your new super fast PC
Check the Properties option on your C: drive and you will see that Windows is running on the new M.2 SSD. If you want to use your old hard drive as a secondary storage drive (or you want to pull old files from it), you can now shut down your PC and reconnect it. However, if your PC boots back into your old drive at this point, you will again need to go into your BIOS/UEFI menu and set your new M.2 SSD as the primary boot drive. Refer to your manual or online instructions for your motherboard model for help.
And that’s it! You should now have a PC that not only starts up in seconds, but will open files and applications in a near instant.
If you’re planning on performing this upgrade on your PC, be sure to set up a Slickdeals Deal Alert to catch the best sales on SSDs.
Mike Jackson
Mike Jackson has been writing for high-profile publications for 16 years, primarily in the video game industry, but also covering tech. Mike is an obsessed video game hoarder with hundreds of games spanning a 30-year collection. An entire room in his house is dedicated to Super Mario, and he thinks the Nintendo Switch is “the best invention in human history.” Counseling may be necessary.