Advertiser Disclosure: At Slickdeals, we work hard to find the best deals. Some products in our articles are from partners who may provide us with compensation, but this doesn’t change our opinions. Our editors strive to ensure that the information in this article is accurate as of the date published, but please keep in mind that offers can change. We encourage you to verify all terms and conditions of any product before you apply.
Reading Time: 6 minutesWhen buying a laptop, you’ll notice that optional upgrades can be costly. It’s often cheaper to buy a laptop at its base configuration, and then expand on things like RAM or storage yourself, as these upgrades are relatively easy to do.
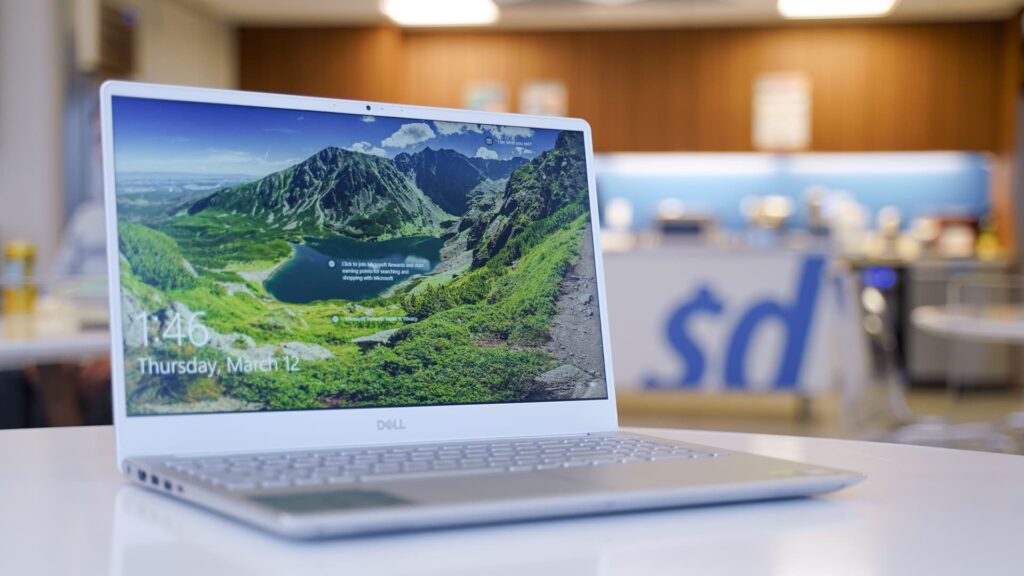
Case in point: Dell’s newest Inspiron 15 7000 laptop is quite powerful out of the box, but as noted in our review, installing more RAM (and some extra storage space while you’re at it) will allow you to take full advantage of its fast processors.
If upgrading your laptop seems overwhelming, we’re here to help. This step-by-step guide will show you how to install a second M.2 SSD and an additional 8GB of RAM into the Dell Inspiron 15 7000. And even if you have a different laptop, you should still be able to follow along since most modern laptops adhere to well-established design standards.
Shop Dell Inspiron 15 7000 Laptops
Buying the Correct Components
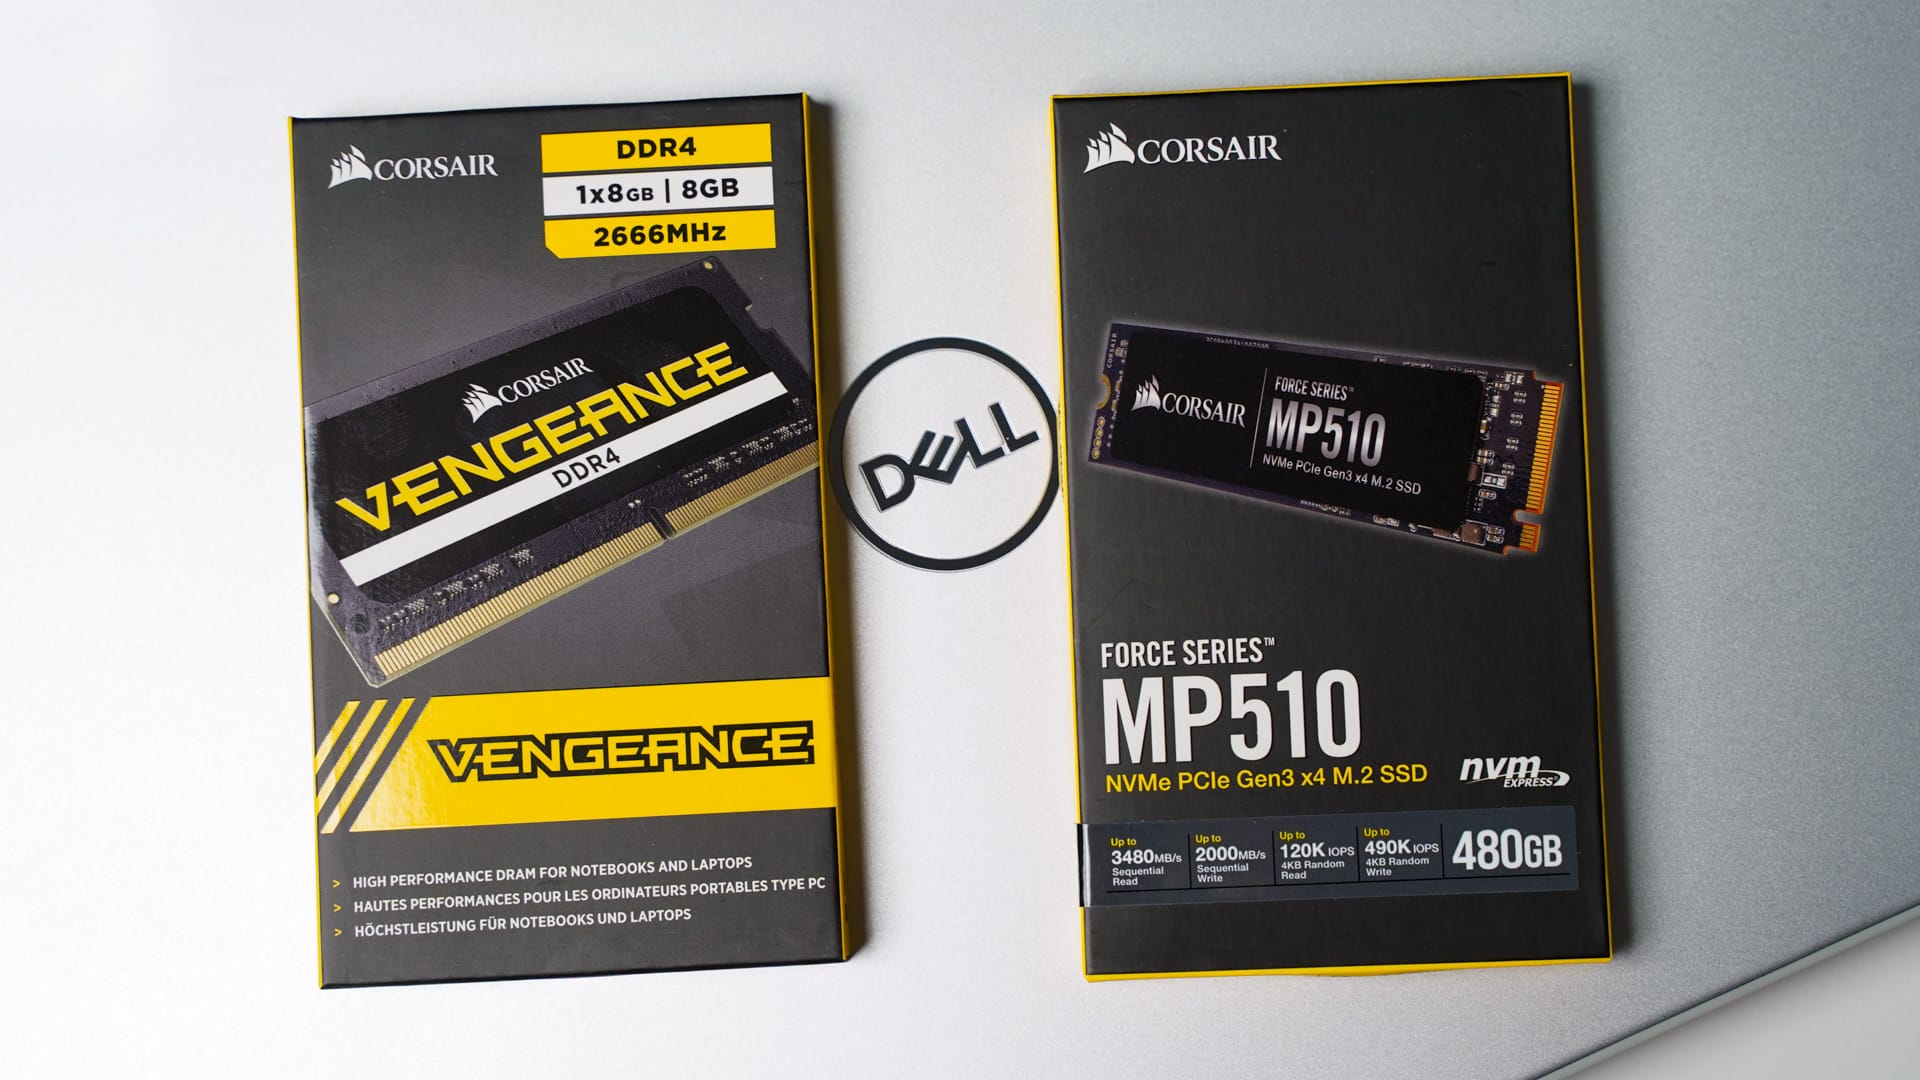
When adding RAM to any laptop, it’s important that you buy RAM that exactly matches what is already in the system. In this case, we need DDR4 RAM that runs at 2666 MHz.
These two specs are always clearly listed. (A quick glance at the Dell website gets you the specs for any of their computers.) You don’t need to know what they mean, you just need to make sure they match your current system. Also, make sure you buy laptop RAM (identified as “SO-DIMM”), which is significantly smaller in size than desktop PC RAM.
As for M.2 drives, they come in two main variations: SATA and PCIe. This defines the type of slot they use to connect to the computer. The Inspiron 7000 takes the superior PCIe type, as should most relatively new laptops.
What We’re Installing
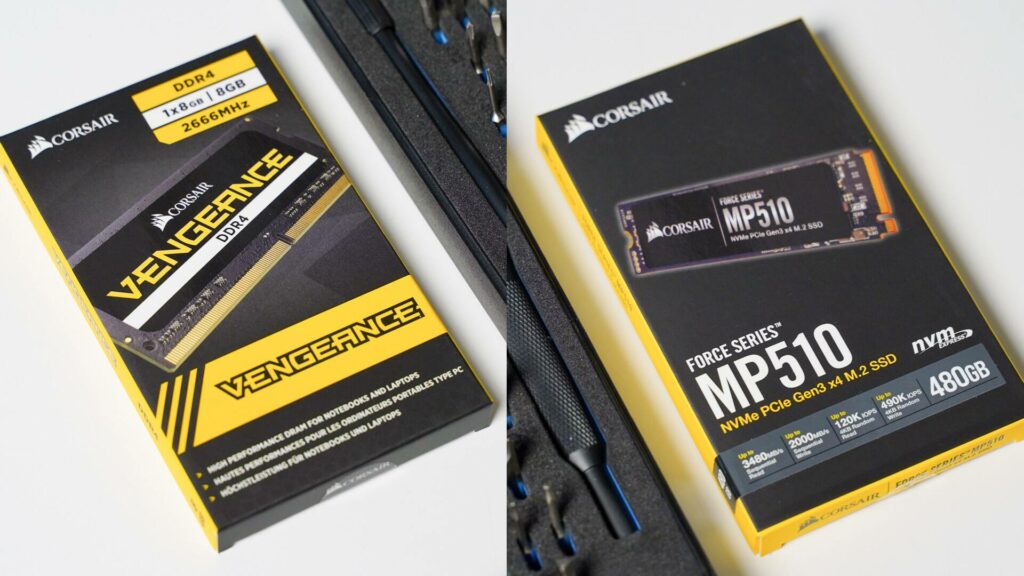
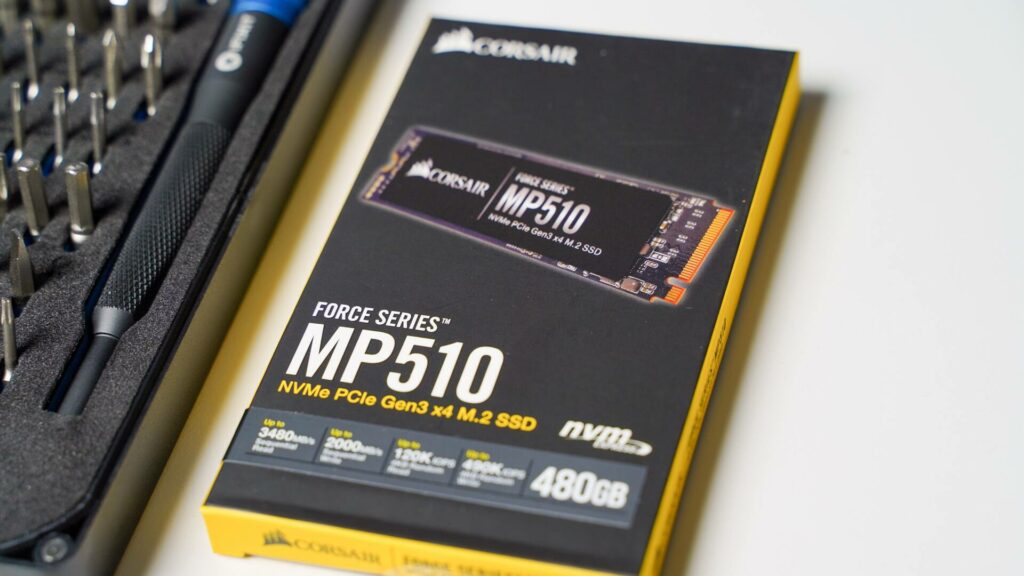
To upgrade the Dell Inspiron 15 7000, we’re installing an additional stick of Corsair Vengeance 8GB 2666Mhz RAM ($43.33), and a Corsair Force Series MP510 480GB PCIe M.2 SSD ($84.99). But for those of you who just want to be “one-and-done,” Corsair also offers a whopping 2TB version of this M.2 SSD.
Special thanks to Corsair for providing the components for this guide!
Both are readily available via Newegg, and can be installed into the Inspiron 15 7000 within around 15 minutes. Now, to install your new upgrades in 10 easy steps…
How to Install the RAM and M.2 SSD in the Laptop
1. Remove the eight screws on the underpanel.
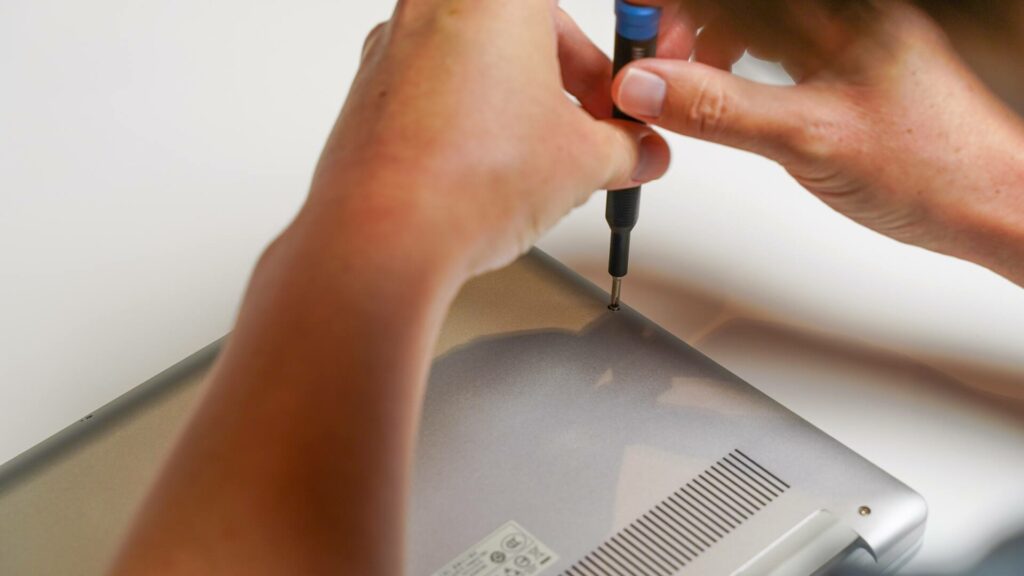
First, we need to remove the underside panel. Make sure you place the laptop upside down on a soft surface to avoid scratching the matte aluminum finish.
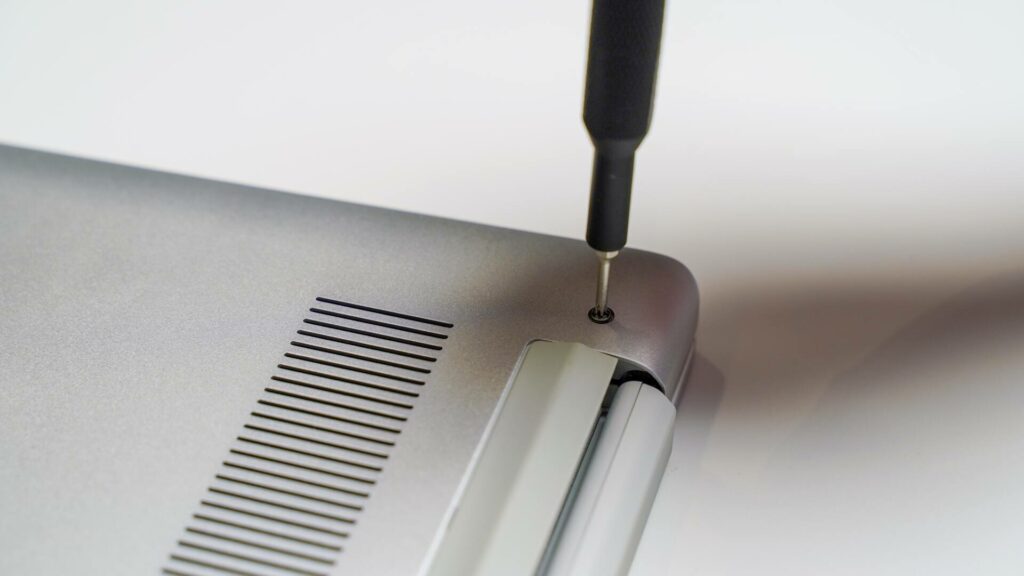
Use a small Phillips (cross-head) screwdriver to remove the eight screws that hold the underpanel on. Note that the three screws closest to the hinge will stay attached to the panel, even when they have been fully unscrewed from the main chassis.
2. Remove the panel to reveal the motherboard.
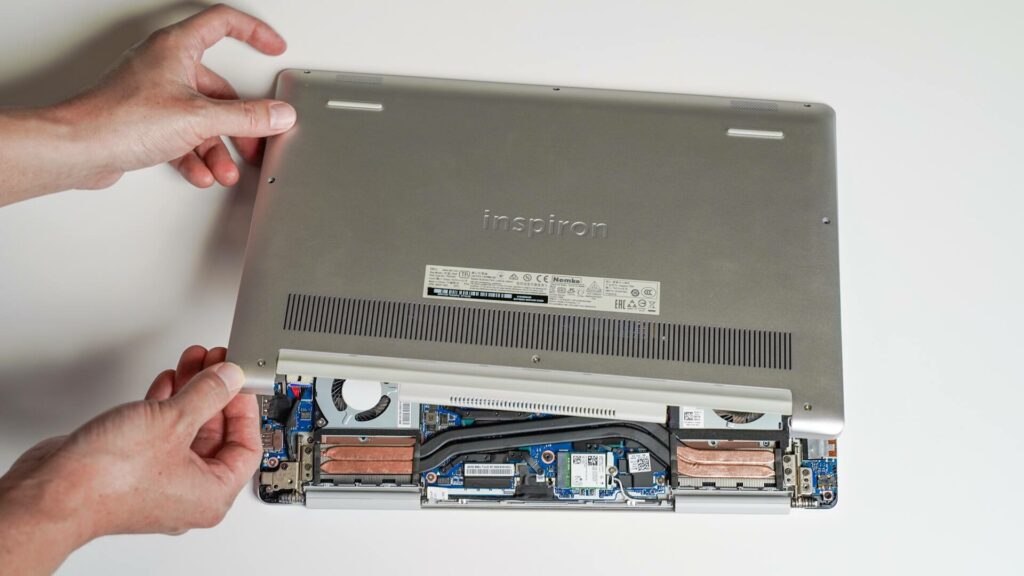
With the screws taken care of, gently pull the panel upward from the hinge area, applying just enough force to release a few plastic clips that still hold it in place. This will reveal the motherboard.
3. Locate the RAM slot.
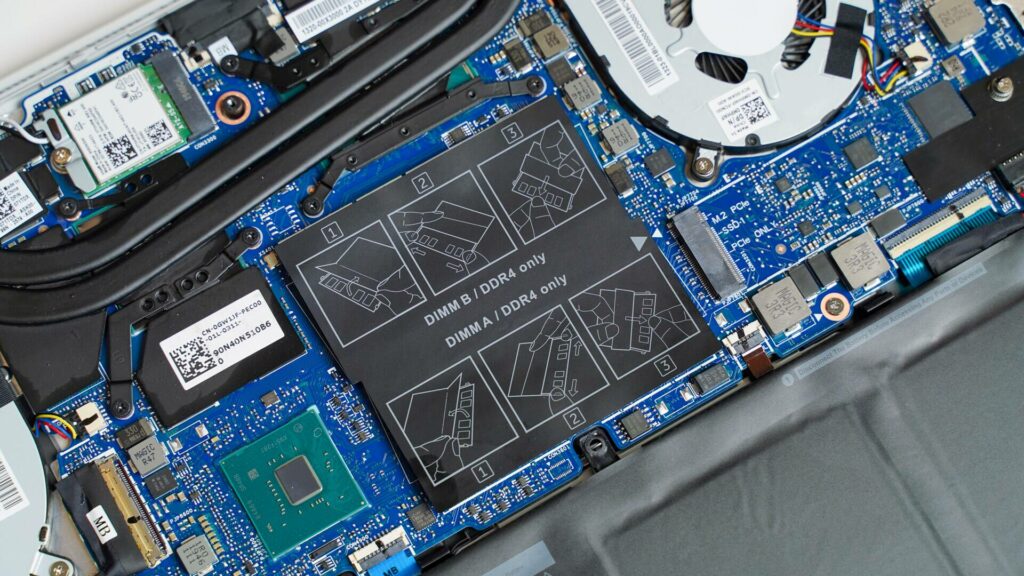
The RAM slots are in the center of the motherboard, under a black plastic flap. Peel back the cover to reveal two RAM slots — one will already have the factory RAM stick installed.
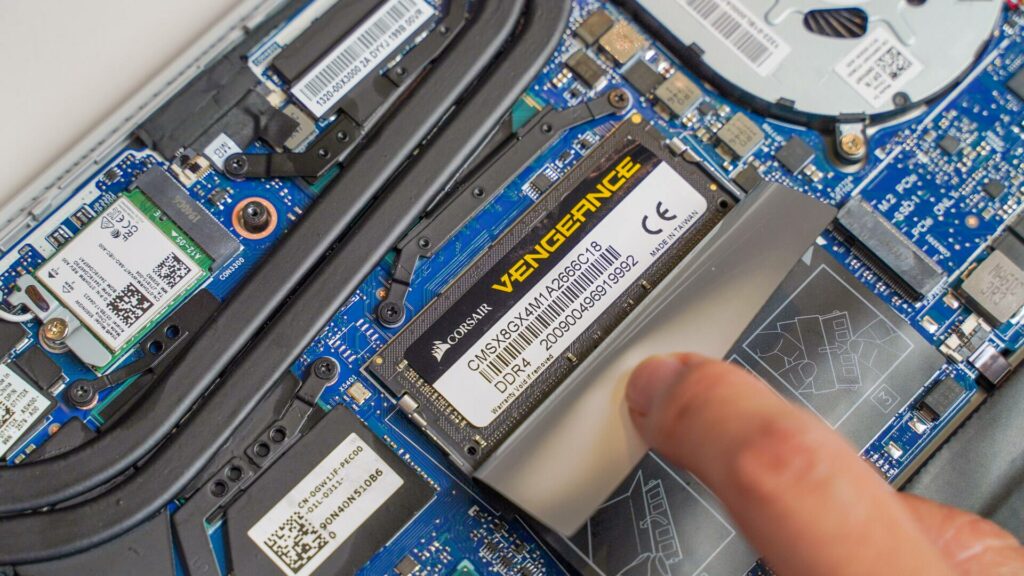
4. Install your new RAM module.
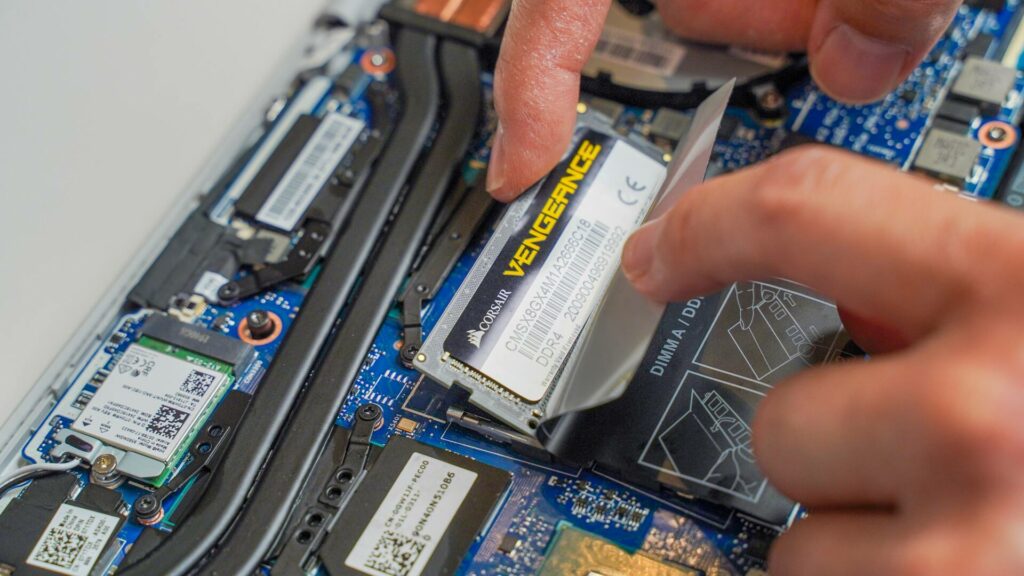
Gently insert your new RAM stick into the second slot, and apply even force until the pins are all the way in.
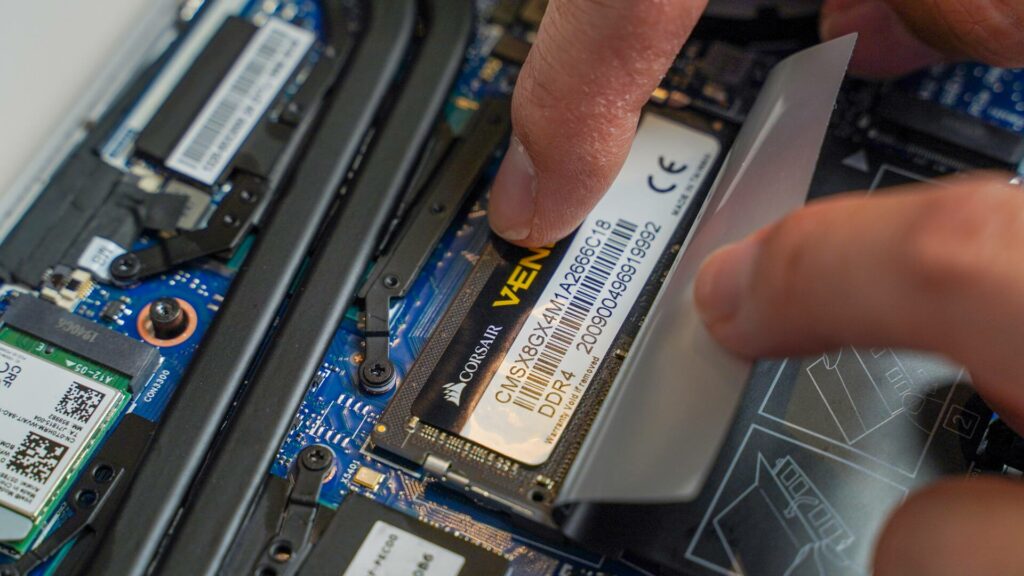
Once inserted, the module will sit at a slight angle. Push the RAM module down into the metal brackets on either side. You’ll know you’ve done it right if the two metal tabs line up nicely with the grooves on the sides of the RAM module, locking it into place.
5. Locate the M.2 SSD slot.
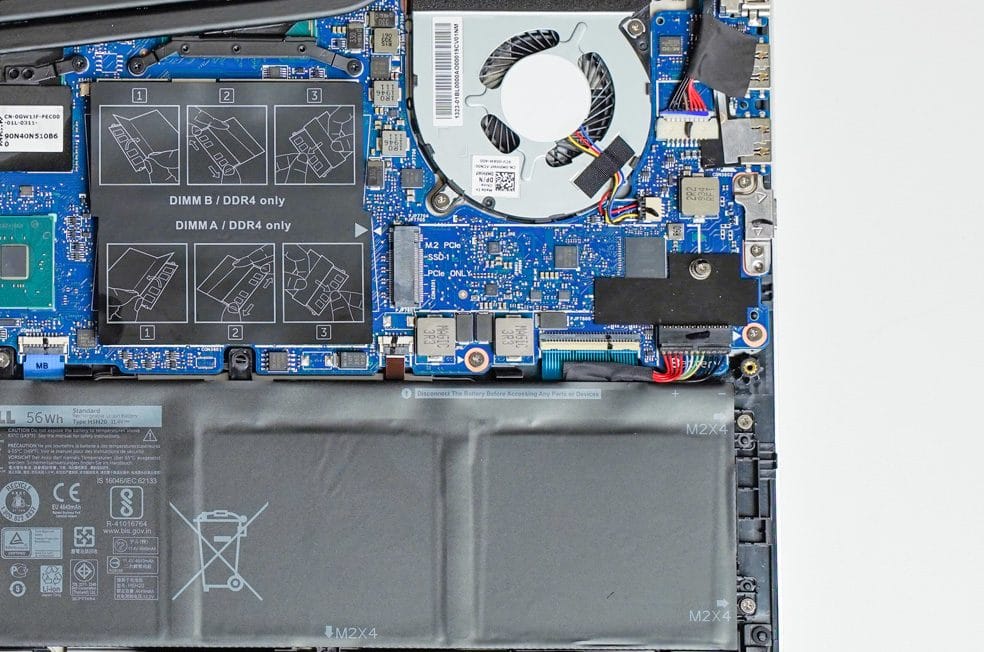
With the battery closest to you, the M.2 slot will be on the right, just below the right fan assembly. You’ll see the label “M.2 PCIe” on the motherboard (as is the case for most laptops).
6. Remove the SSD mounting screw from the motherboard.

Before you install your new SSD, you have to remove the screw that will hold it in place. The screw is about three inches to the right of the slot.
7. Install your new SSD into the M.2 PCIe slot.
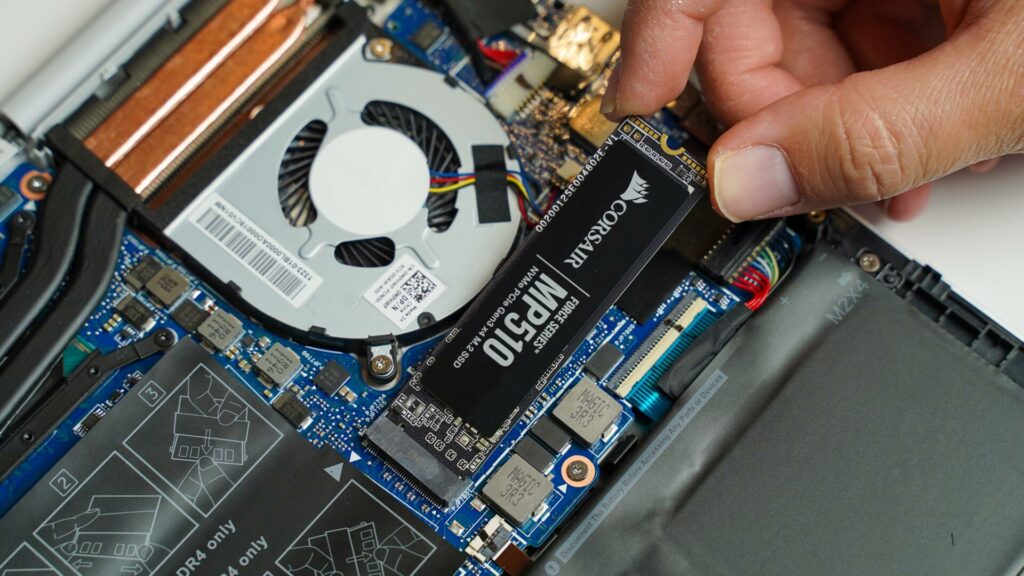
The SSD will insert into the slot easily. A notch in the connector will prevent you from inserting it the wrong way around, so don’t worry.
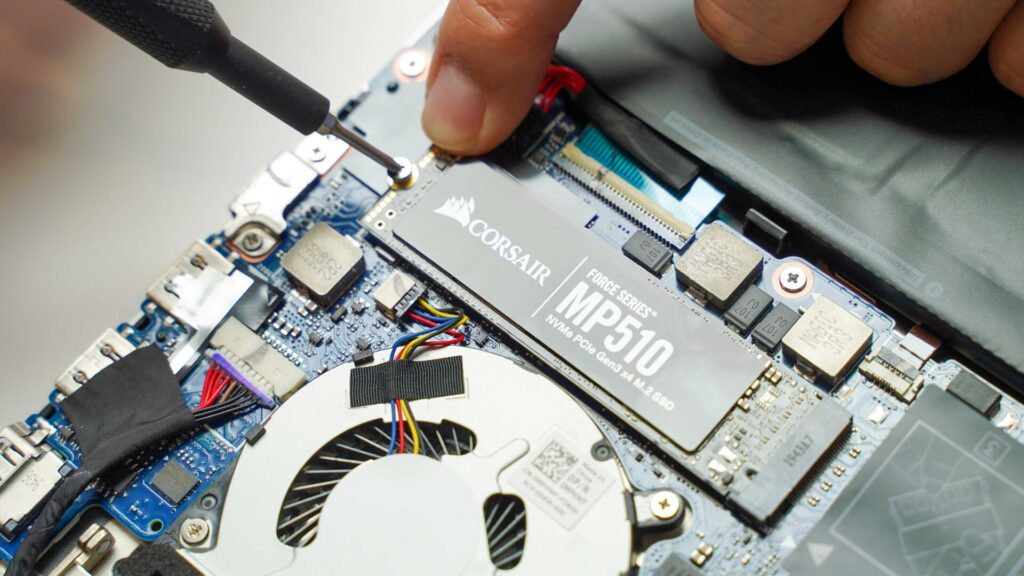
Like the RAM, the SSD will sit at an angle at first. Push the SSD down into place and re-install the mounting screw to hold the SSD firmly in place.
8. Reinstall the underpanel.

Place the panel in line with the screw holes, and re-install the screws to finish the physical installation. Now, let’s get everything running in Windows.
8. Turn on your laptop and confirm your PC recognizes the new upgrades.
When you first turn on the laptop, it should automatically recognize the new RAM and display a startup warning message that confirms this. Hit the Enter key to confirm.
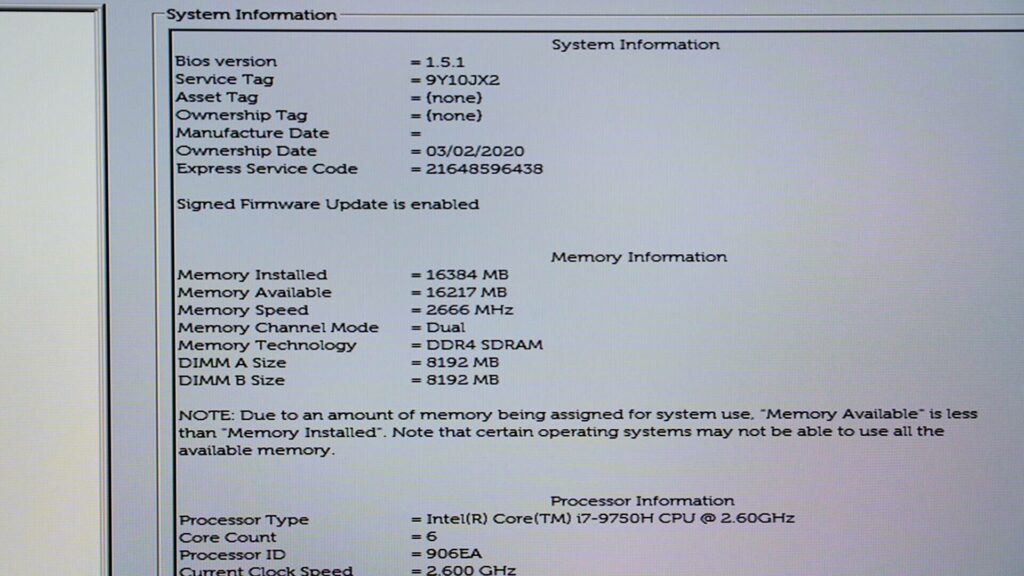 You can also confirm that both the RAM and SSD are recognized via the BIOS menu. To reach the BIOS, press the F2 key right when the Dell logo is displayed during startup (before Windows appears).
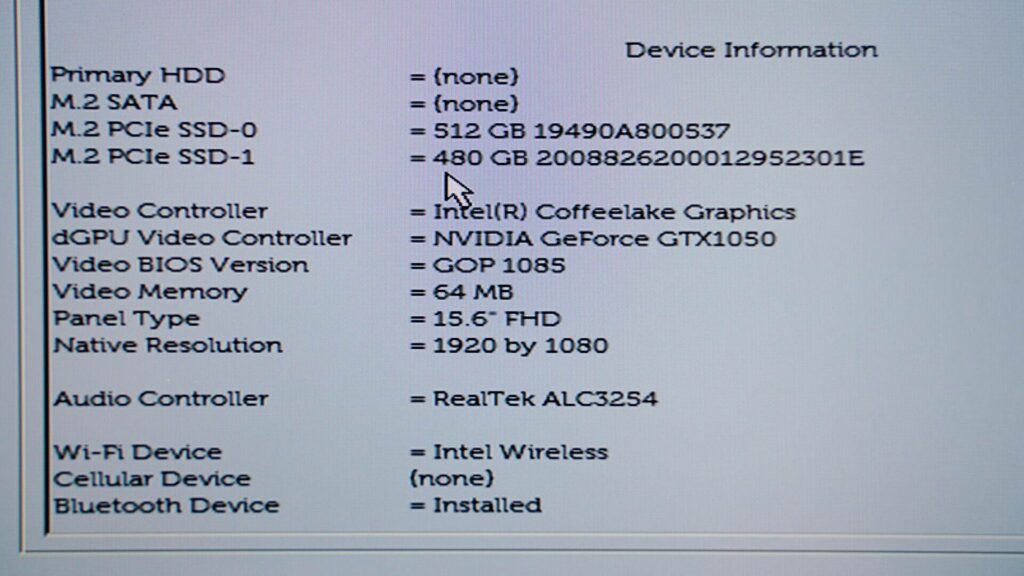 In the BIOS menu, click on ‘System Information’. Look for the ‘DIMM A Size’ and ‘DIMM B Size’ – both should read ‘8192 MB’. Then scroll down to the ‘M.2 PCIe SSD-1’ line, which should show the 480GB drive.
9. Boot into Windows and initialize the new SSD.
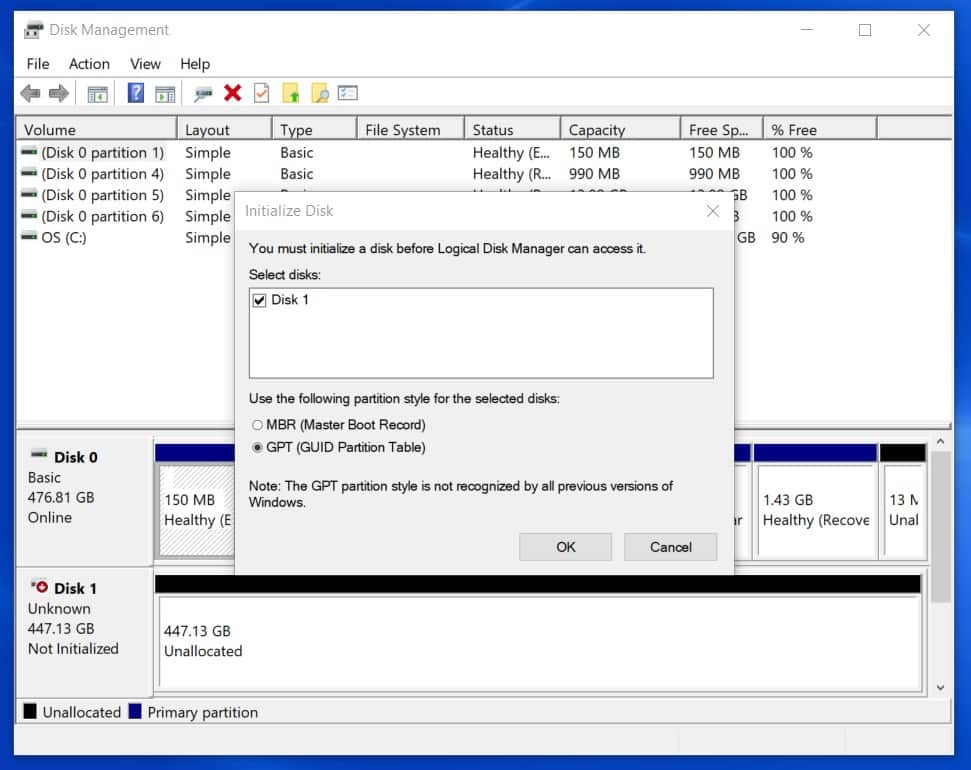
Initially, your new SSD won’t show up in Windows. To access it, first click on the Start Menu and type ‘disk management’. Click on the Control Panel option that reads ‘Create and format hard disk partitions.’
In the Disk Management app, you will likely get an ‘Initialize Disk’ popup. Select GPT and click ‘OK.’
10. Format your drive to ready it for use.
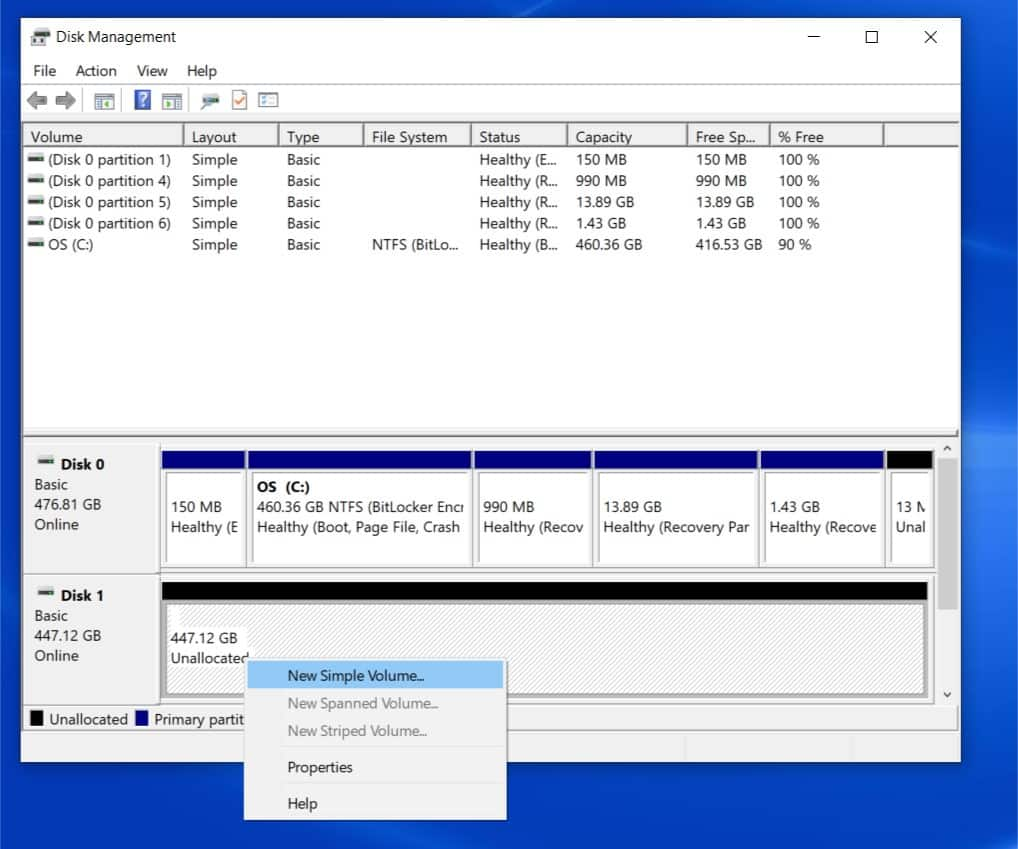
You will now see your new drive as an unallocated drive in the table at the bottom of the Disk Management window. Right-click on it and select ‘New Simple Volume’.
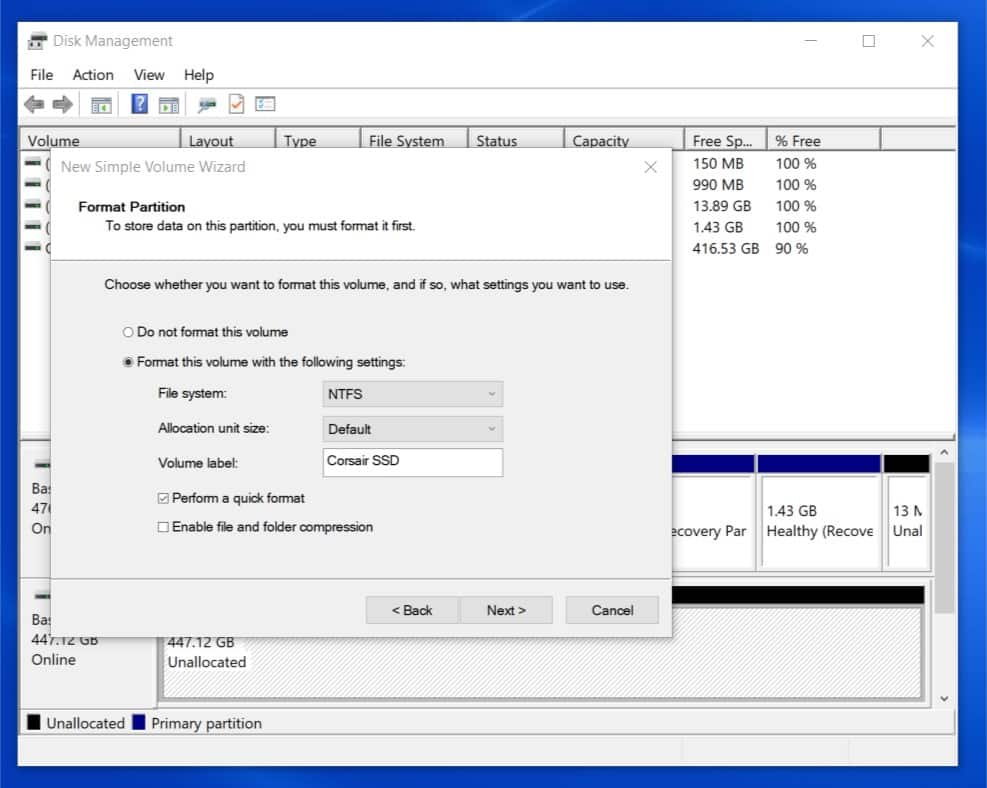
In the New Simple Volume Wizard, keep clicking ‘Next’ to complete the process, changing the assigned drive letter and volume label if you see fit.
That’s it! You will now see your speedy new drive in ‘This PC’ in File Explorer, ready to be filled with video games or anything else you need.
Whether you’re hunting for a new laptop or just looking for components to upgrade your existing computer, you don’t want to miss a good deal. Set up a Deal Alert for any product, manufacturer or retailer to be notified as soon as a new offer is posted.
Up Next:
Mike Jackson
Mike Jackson has been writing for high-profile publications for 16 years, primarily in the video game industry, but also covering tech. Mike is an obsessed video game hoarder with hundreds of games spanning a 30-year collection. An entire room in his house is dedicated to Super Mario, and he thinks the Nintendo Switch is “the best invention in human history.” Counseling may be necessary.