Advertiser Disclosure: At Slickdeals, we work hard to find the best deals. Some products in our articles are from partners who may provide us with compensation, but this doesn’t change our opinions. Our editors strive to ensure that the information in this article is accurate as of the date published, but please keep in mind that offers can change. We encourage you to verify all terms and conditions of any product before you apply.
Reading Time: 5 minutesAdding a solid state drive (SSD) is the best way to improve a computer’s performance, and the rising popularity along with falling prices of a new style of SSD — M.2 2280 — has everyone trying to jump on the bandwagon. But don’t act too hastily as not all computers can accept this latest generation of blazing-fast storage. As Slickdeals’ resident computer geek, I’ll be showing you how to tell if an M.2 SSD is right for your system, and also guide you through a step-by-step installation process using a GIGABYTE BRIX Gaming VR ultra compact PC and XPG SX8000 PCIe M.2 SSD.
Special thanks to GIGABYTE and XPG for loaning us example products for this how-to guide!
1. Find the M.2 Connection
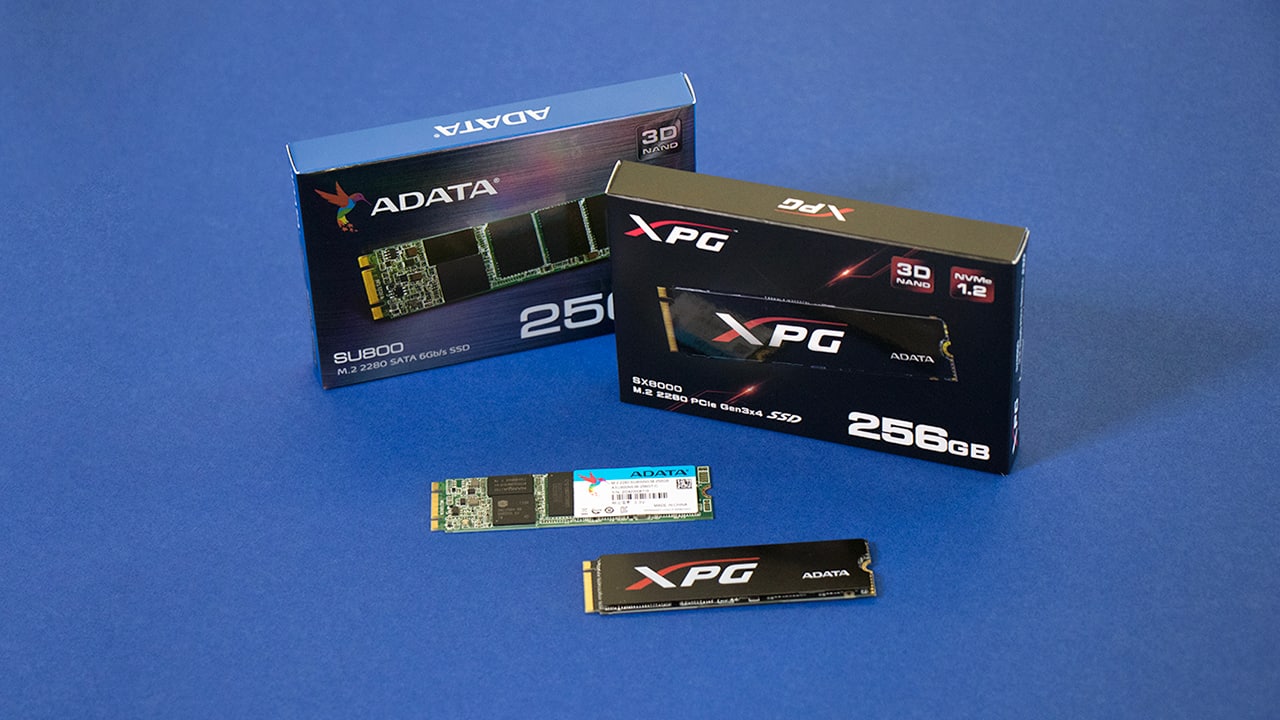
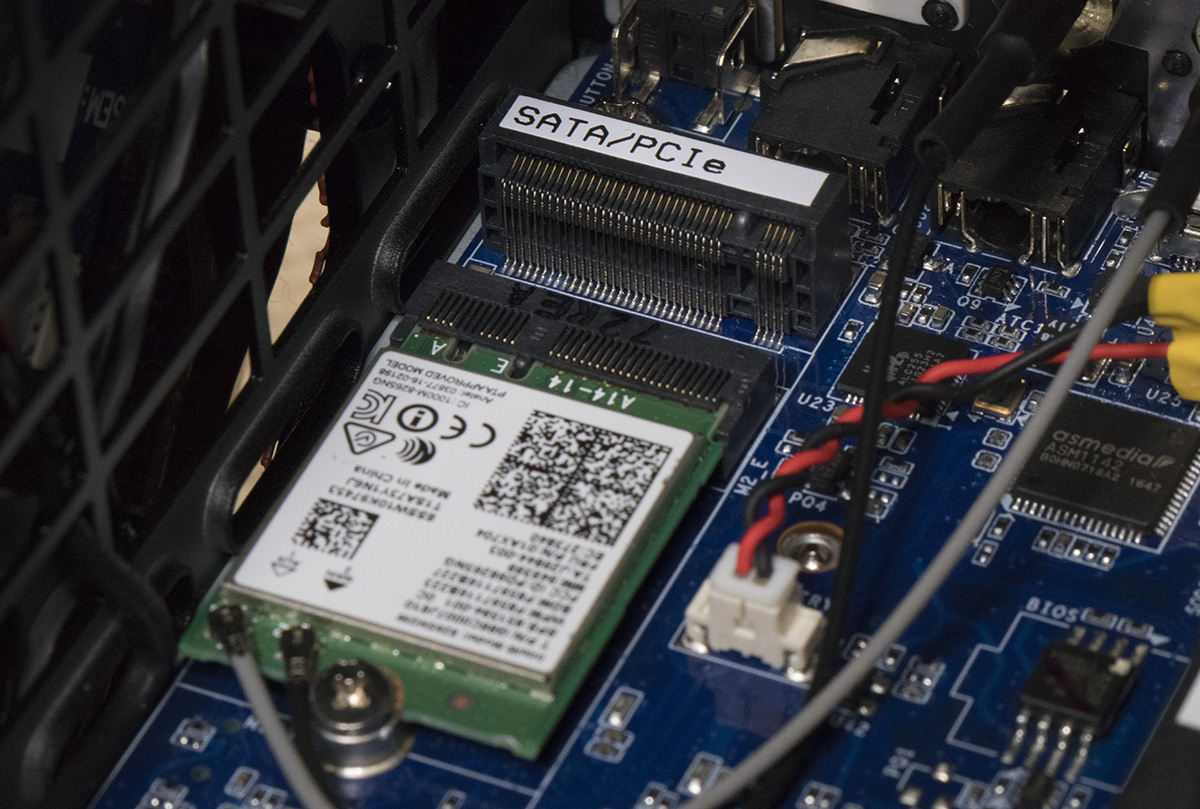
Before you rush to buy an M.2 SSD via Slickdeals, first make sure your PC is compatible with this type of storage. Only the latest generation of motherboards can accept this new style of SSD, which was originally used primarily in laptops. On the motherboard, look for an M.2 connector — it’s a horizontal slot about an inch wide, usually labeled with “PCIe” or “SATA” or both. Take note of what’s on the label because you’ll need to buy a matching M.2 SSD; a PCIe device won’t work on a SATA connection.
Every manufacturer places the M2 connection in a slightly different area, so look carefully in the middle and lower right section of the motherboard. If you don’t see a connection like this, it means your motherboard does not support the M.2 form-factor, and you should stick with 2.5-inch SSDs.
2. Buy the Correct Type of M.2 SSD
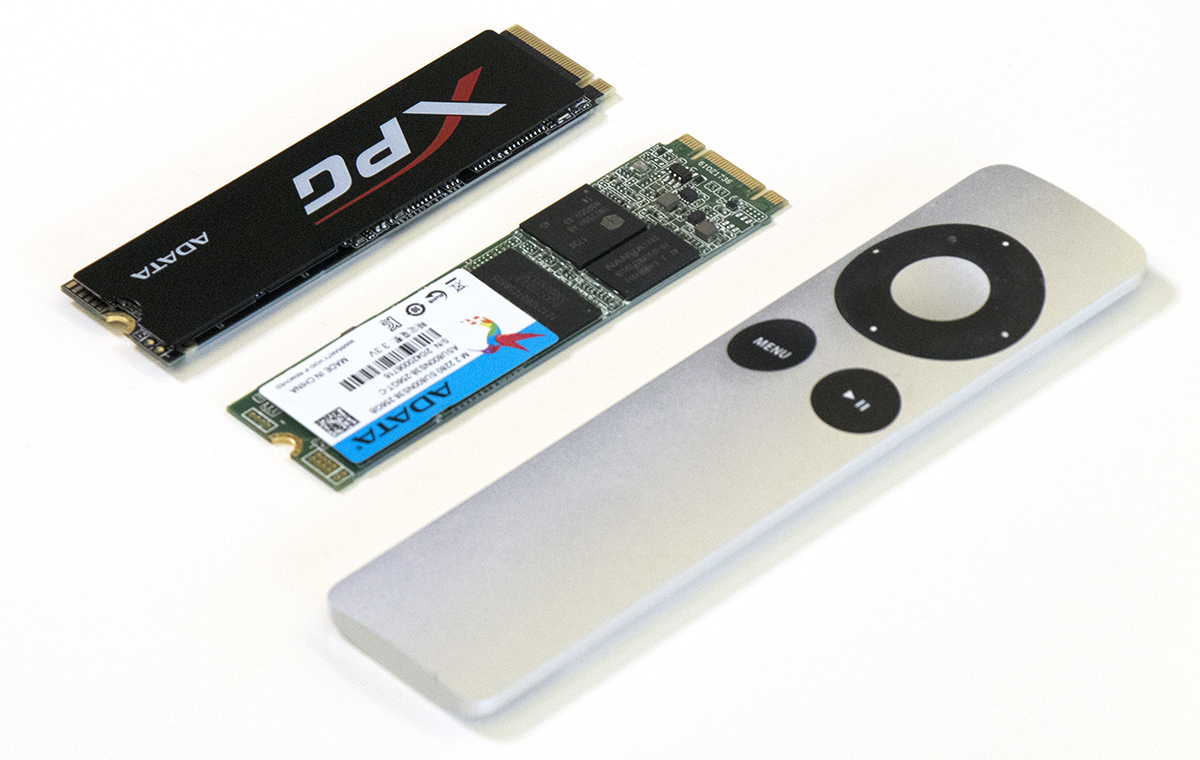
What’s not immediately apparent when shopping for these new types of SSDs is that “M.2” refers to a form-factor — in this case, it looks like a stick of Wrigley’s chewing gum.
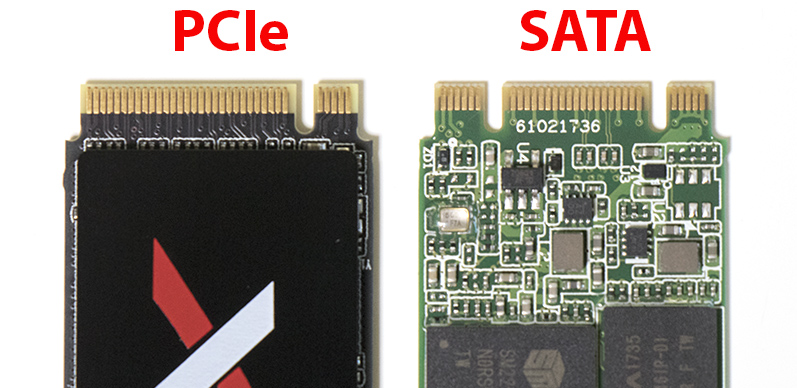
And the way an M.2 SSD communicates with the computer, along with its maximum read/write speed, are identified by technology standards called “PCIe” and “SATA.” PCIe is faster than SATA, but both are great upgrades for any computer, and Slickdeals often features deals for both PCIe M.2 SSDs as well as SATA M.2 SSDs. Remember how you identified the type of M.2 slot on your motherboard? You’ll want to buy a matching SSD (PCIe or SATA) for that connection. If you’ve already purchased an M.2 SSD and aren’t sure which version you have, the quickest way to find out is to look at the notches on the connector.
A PCIe M.2 SSD has a single notch on the right side, while a SATA M.2 SSD features two notches.
3. Install a SATA or PCIe M.2 SSD in a Desktop PC
Now that you’ve confirmed your PC has an M.2 slot and purchased the appropriate M.2 SSD, you’re finally ready to install this tiny-but-powerful storage solution. Follow this step-by-step guide on how to install either a SATA or PCIe M.2 SSD in your computer.
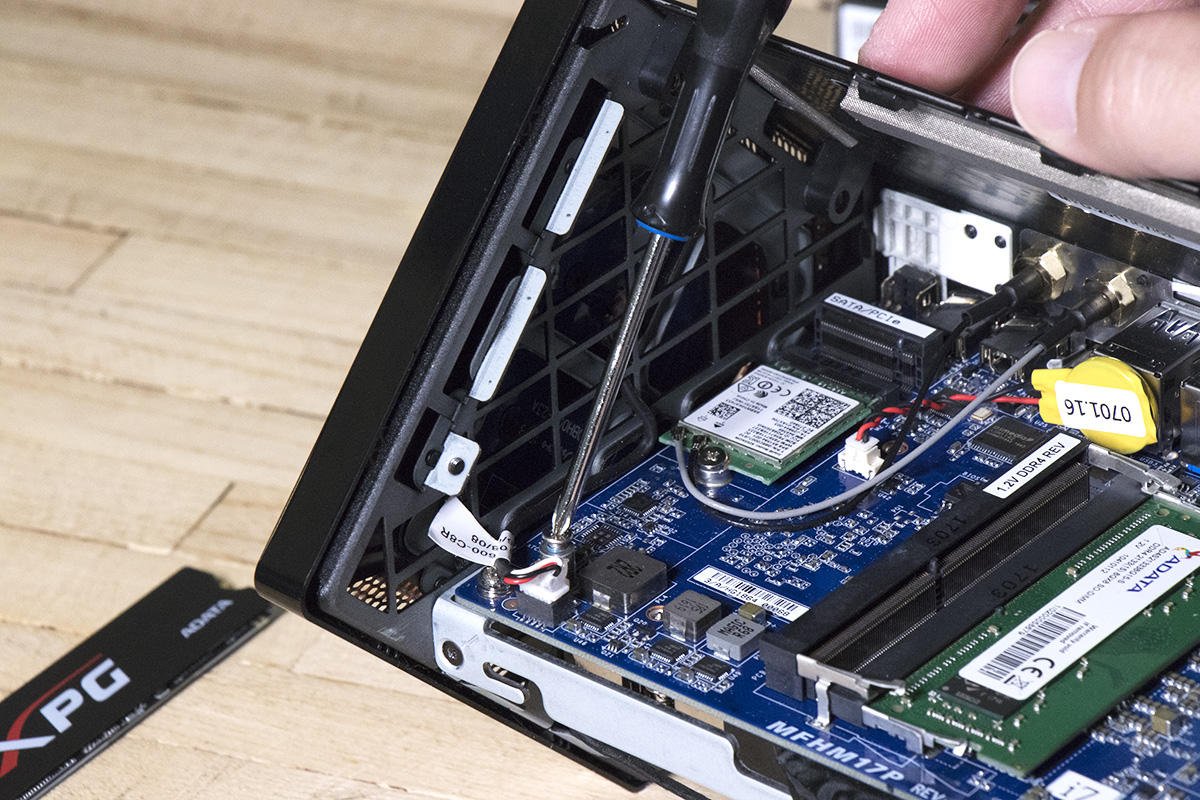
Step 1: Remove the mounting screw located across from the M.2 slot.
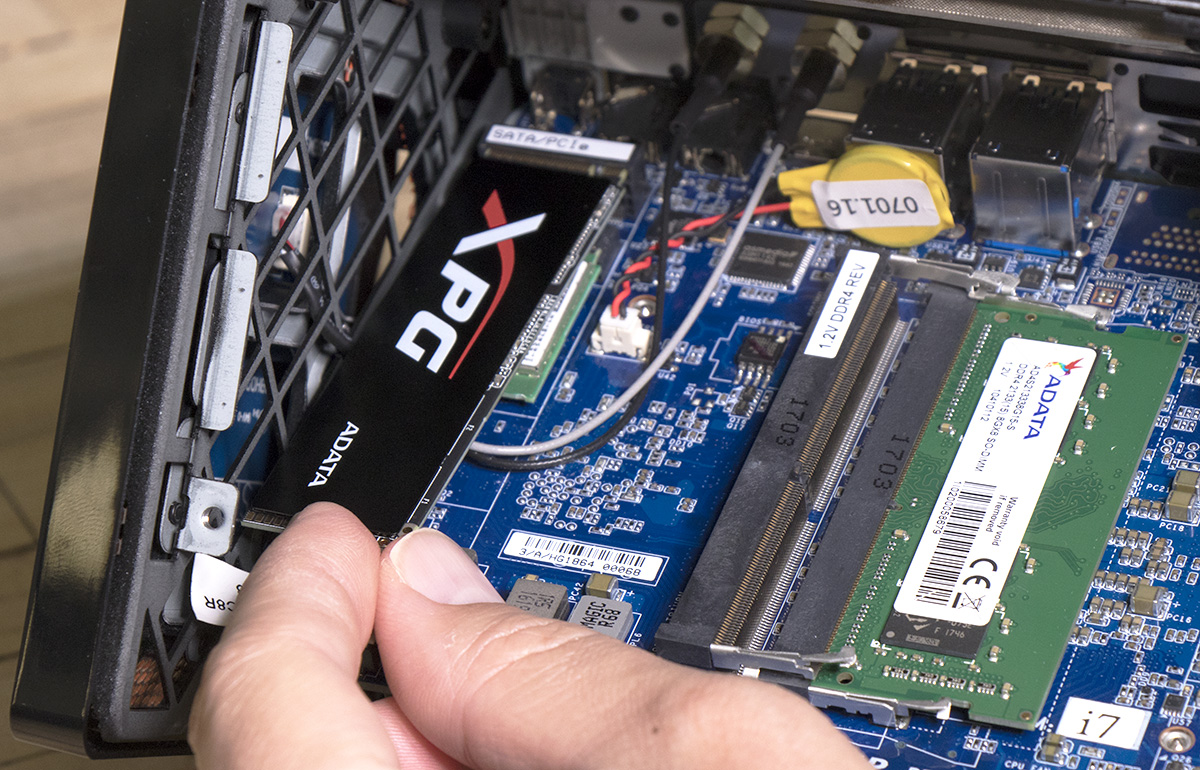
Step 2: Carefully insert the M.2 SSD
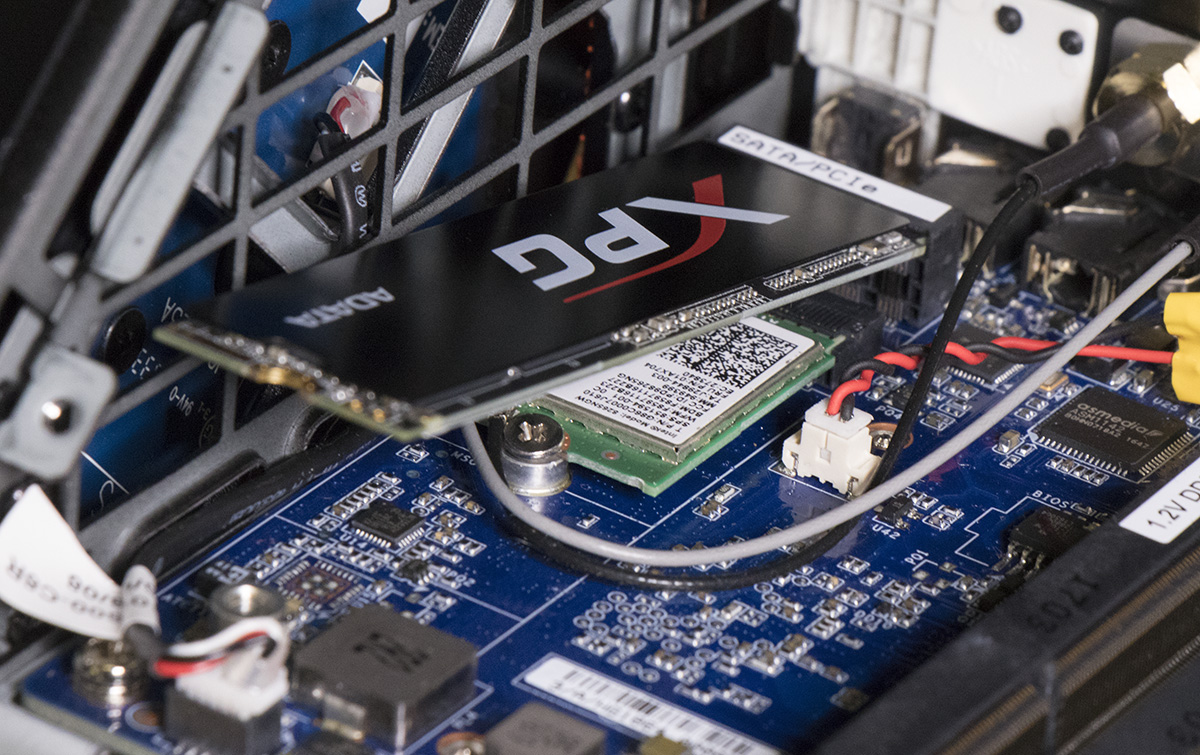
Gently push the M.2 SSD into its slot, paying attention to the notch. The SSD will naturally stand at an angle when inserted — this is normal.
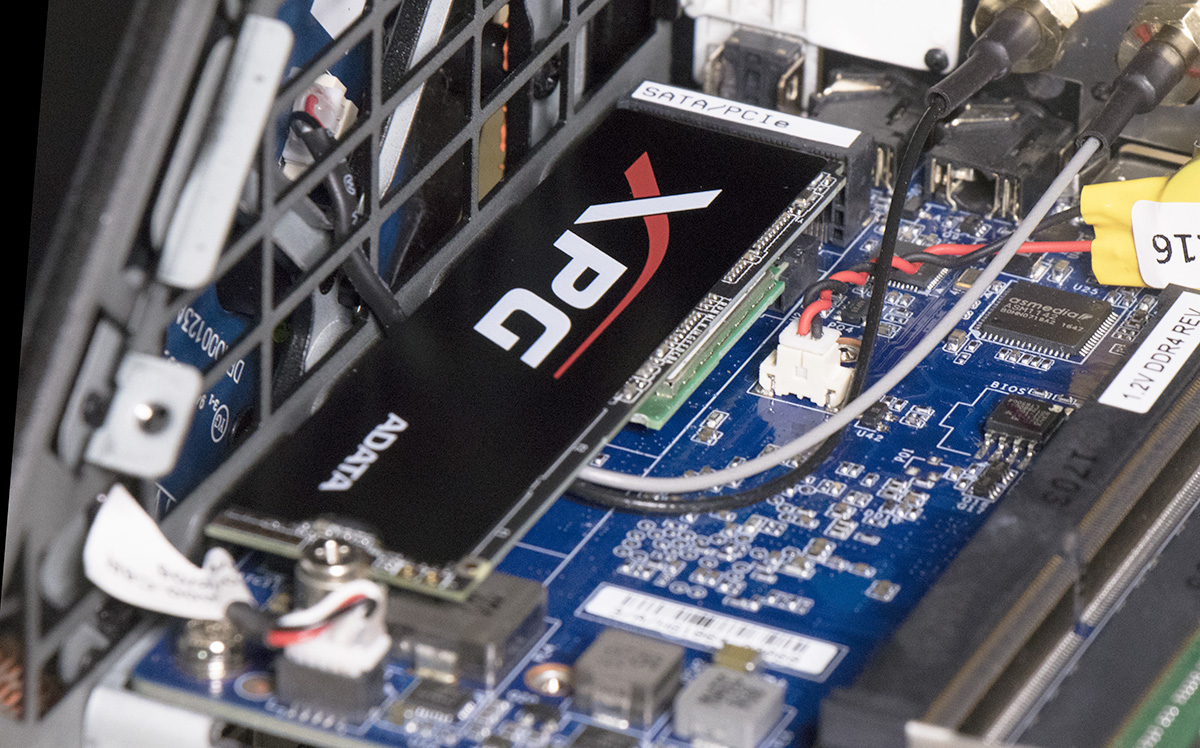
Step 3: Secure the M.2 SSD using the mounting screw Press down and hold the M.2 SSD while you replace the mounting screw that was removed in Step 1. This will secure the SDD in place.
That’s it! Your new M.2 SSD is now installed.
4. Make Sure the M.2 SSD Is Recognized by Your Computer
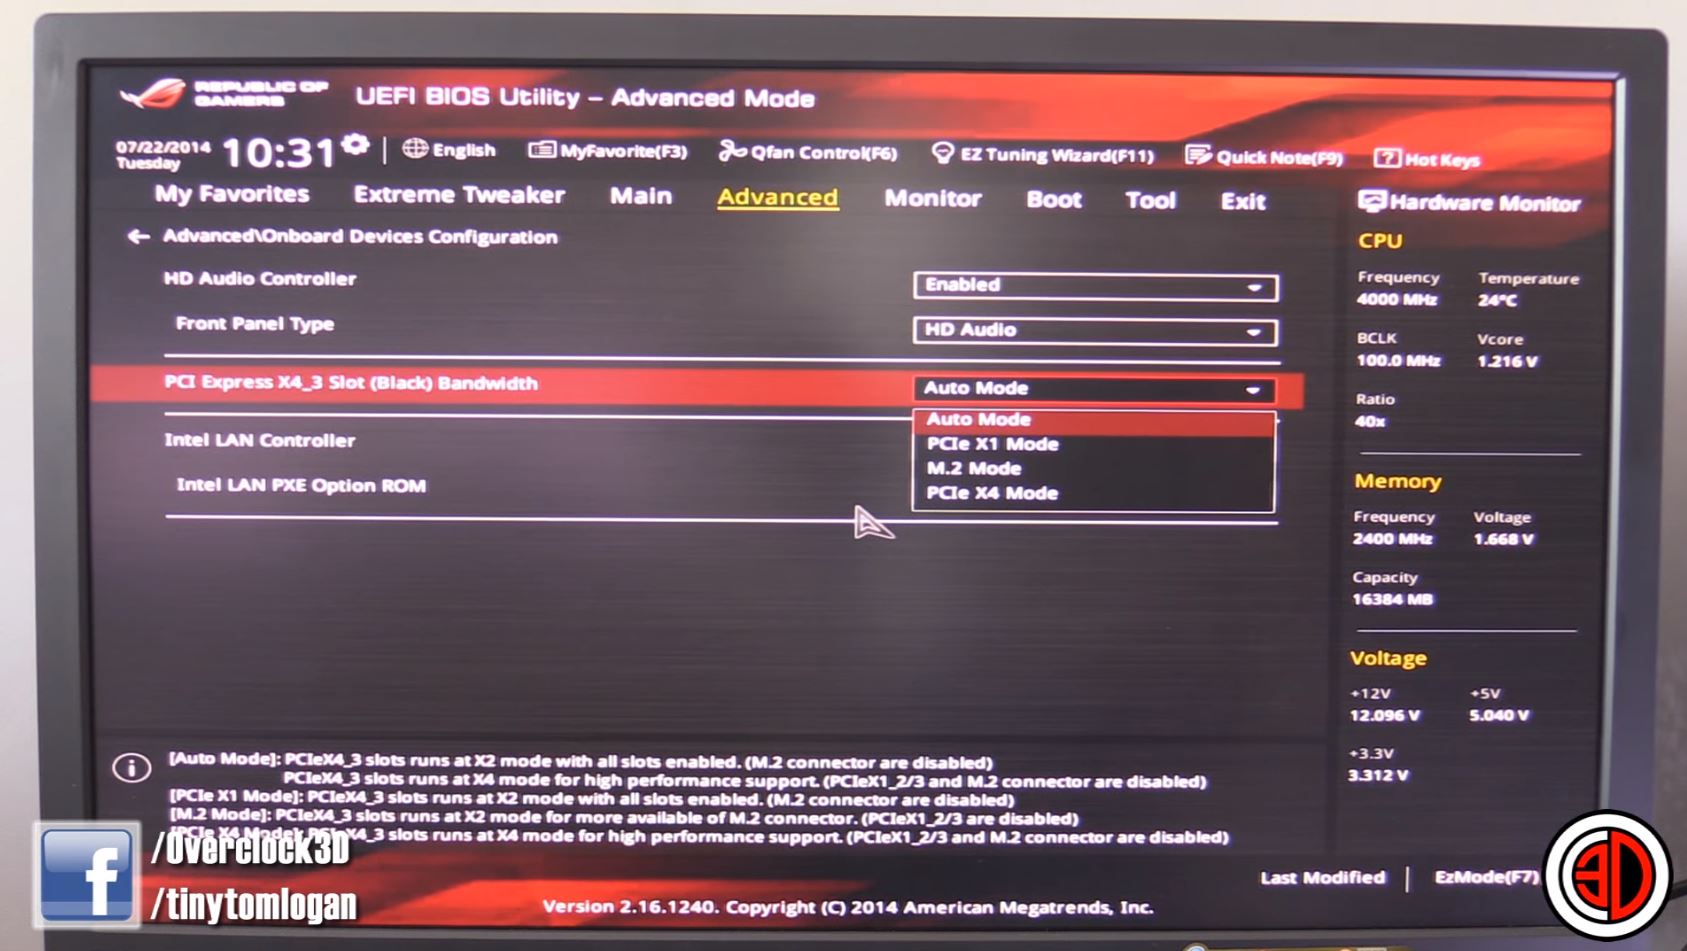
The final step after you’ve installed the M.2 SSD is making sure your computer recognizes it as a new storage device. Some motherboards will automatically detect an M.2 SSD, but when that doesn’t happen, you’ll need to manually tell BIOS that an M.2 device is connected. During the boot-up process, hold “Delete” to enter BIOS. Each manufacturer’s BIOS menu is a little different, so I’ll explain generally what you need to do, and then you can look for similar wording in your own system menus.
In BIOS, go to Advanced settings, then go to Onboard Devices Configuration. Look for the PCI Express X4_3 Slot Bandwidth section and set the option to “M.2 Mode“.
After you save and exit BIOS, it’s business as usual in terms of installing Windows to the M.2 SSD or setting it up as an additional storage drive. Congratulations on installing one of the most impactful computer upgrades available today!
Recent Internal SSD Deals
- Mushkin Enhanced Pilot-E M.2 2280 2TB PCIe – Sale Price: $198.99 | Reg. Price: $309.99
- Crucial MX500 2TB 3D NAND SATA 2.5 Inch Internal SSD – Sale Price: $197.99 | Reg. Price: $229.99
- Hyundai 960GB SSD SATA III 3D NAND 2.5 – Sale Price: $79.99 | Reg. Price: $88.99
- 980 PCIe3.0 NVMeSSD 1TB – Sale Price: $99.99 | Reg. Price: $139.99
Recent External Hard Drive Deals
- SanDisk 1TB Extreme Portable SSD – Sale Price: $109.99 | Reg. Price: $249.99
- WD 1TB My Passport SSD External Portable SSD – Sale Price: $134.99 | Reg. Price: $199.99
- Seagate Expansion 6TB External Hard Drive HDD – Sale Price: $124.99 | Reg. Price: $159.99
- Portable SSD T7 USB 3.2 2TB – Sale Price: $219.99 | Reg. Price: $269.99
Recent Computer Monitor Deals
- Mobile Pixels Trio Max Portable Monitor – Sale Price: $247.99 | Reg. Price: $329.00
- ViewSonic 27-Inch IPS 1080p LED Monitor – Sale Price: $209.99 | $229.99
- 34″ Monoprice Dark Matter Curved Ultrawide Monitor – Sale Price: $399.99 | $499.99
- 27″ GIGABYTE G27Q FreeSync HDR400 Gaming Monitor – Sale Price: $279.99 | $299.99
More to Consider:

